How to remove Onedrive files from appearing on Desktop
I am Jaspreet Singh. The solution is partially correct. You do not need to follow the steps to move the location or to stop syncing the folder part. Just click on onedrive icon in taskbar then on gear icon in top right hand side then on settings. In settings popup click on backup tab and then click on Manage Backup (upper right) This will show you three sections click on stop backup on desktop and confirm the choice.
This will bring back all the data for desktop on your system and will put it in a folder with a link to it on the desktop saying “where are my files” Click on that link then cut and paste the data back to the desktop.
** This unfortunately also stops the automated backup of your desktop so if you want to have desktop files on onedrive you will need to manually backup the files or keep them on a location that backs up to onedrive.
Rules for required minimum distributions have changed—here’s a guide on when and how to take them
A great feature of traditional individual retirement accounts and employer-sponsored retirement plans like 401(k)s is that their money can grow tax-deferred for years. But eventually, the tax piper must be paid. That’s when Required Minimum Distributions, or RMDs, kick in and federal — plus sometimes state — ordinary income taxes will be due.
RMDs are the minimum amounts you must withdraw from your retirement accounts each year. They are the method by which the government ensures you’ll eventually be taxed on the money you saved tax-free. Rules governing RMDs are a little complicated and they have changed twice in recent years: first, in 2019, with the Secure Act and then in 2022 with the Secure 2.0 law.
As Christine Moriarty wrote in her Next Avenue article on year-end tax moves, the Secure Act bumped the age to begin taking RMDs from 70½ to 72 starting in 2020. Secure 2.0 pushed back the threshold even further — to either age 73 for people turning 72 after 2022 or age 75 for people turning 74 after 2032.
Your first RMD must be taken by April 1 of the year after you reach the starting age for distributions. Subsequent RMDs have to come out of the retirement plans by Dec. 31 each year.
If you choose to delay that first RMD until April 1, you will end up having to take two distributions in that second year, noted Amanda Lott and Sarah Backer in their J.P. Morgan wealth-planning strategy advisory, “Why taking RMDs on time is so important.”
RMDs aren’t required for Roth IRAs, but they are for people who inherit them.
If you fail to take your RMD, you’ll be socked with a tax penalty equal to 25% of the amount due. Before the Secure 2.0 law, this excise tax was a steep 50%. The penalty drops to 10% if you make up the missed RMD within two years.
You can also file for a penalty waiver on Form 5329 with your tax return if you send the missed RMD.
“You can take your RMD from any of your IRA accounts or you could take some money out from each one,” personal finance journalist and author Terry Savage said on the recent Friends Talk Money podcast episode on RMDs that I co-hosted with her and Pam Krueger.
One exception: if you have money in a 401(k) or 403(b) employer-sponsored retirement plan, you must take a specific RMD from it.
How much must you withdraw?
Exactly what percentage of your retirement accounts you will need to withdraw each year is based on a complicated Internal Revenue Service calculation There are worksheets on the IRS site to determine your RMD.
“The government doesn’t care whether you have $25,000 in your IRA or $2.5 million; the RMD is a percentage based on the amount that’s in there,” said Savage.
Your annual RMD percentage is based on your age and estimated life expectancy. Essentially, the IRS’ aim is for you to eventually take all your money out of your retirement accounts over your lifetime.
Determining your RMDs
But you needn’t worry that a huge percentage of your retirement funds must be withdrawn in any one year.
Say you’re 80 and have $100,000 in retirement accounts subject to RMDs. Your RMD this year would be roughly $5,000, or 5% of the total you’ve invested. That percentage will rise each year as you get older.
If you have more than one retirement plan that will demand RMDs, total up their balances to calculate your distribution amount.
A financial services firm holding your IRA can tell you how much you’d owe and ways to receive the cash. It can also withhold taxes for you. “I’d suggest withholding at least 20% — more if you’re in a high tax bracket,” said Savage.
One thorny RMD issue is whether to take distributions all at once, such as at year-end, or a little each month. There are pros and cons either way.
One reason to do it all at once, early in the year, is that you can reinvest the money (excluding any you’ll use to pay the RMD taxes) — anywhere other than in a tax-deferred account. This could help your withdrawn cash grow, depending on how the new investments perform.
But the drawback is that one big annual distribution could trigger estimated taxes for the quarter of the withdrawal.
The advantages of making RMDs monthly are that you’ll lower the risk of owing more estimated taxes and you can factor in the distributions to manage your monthly cash flow.
You’ll want to discuss the best RMD strategy with your tax adviser.
Krueger suggests that when you near the age when your RMDs will start, keep some of your IRA in cash. That way, you won’t be forced to sell investments to come up with money to pay taxes on the distributions.
To save on taxes, you might consider making a qualified charitable distribution (QCD) directly from a traditional IRA with an amount equal to the RMD. That money can then count toward your RMD and won’t be included in your taxable income. There’s a $100,000 annual limit on these distributions.
“Not only does the check have to be written before the year-end, it has to be cashed by the charity before the year-end,” said Savage.
You cannot use a tax-favored donor-advised fund to make qualified charitable distributions, though.
RMD rules can get especially tricky with inherited IRAs. The RMD amount and time limit for the distributions will depend on who owned the IRA and who will receive it.
Inherited IRAs and RMDs
Generally, a beneficiary must liquidate the account by the end of the 10th year after the death of the IRA owner who wasn’t their spouse. Before the Secure Act, such inherited IRA distributions could be spread out over your lifetime.
An RMD may be required in the first nine years if the original owner had already started taking the required distributions.
Since RMD rules vary for different inherited IRA situations, though, talk with your tax adviser to be sure you’ll follow them correctly and not incur a tax penalty.
When you back up your files, apps, and settings in the cloud using your Microsoft account, you get 5 GB of free cloud storage and other benefits that protect your files with the latest security and make everyday tasks easier.
Your Microsoft account ties everything together, no matter where you are or what PC you’re using. This means your personalized settings will be remembered with your account, and your files are accessible from any device. You can unlock premium features like more cloud storage, ongoing technical support, and more, by purchasing a Microsoft 365 subscription for your account.
Here are some of the benefits that come with a fully backed up PC. Select any headline, and it will open to provide more information:
Access and Share your Files
With your photos and files backed up in the cloud, you can quickly save, share, and edit them with OneDrive and Microsoft 365. Your changes will automatically sync across devices so you’ll be able to access the latest versions of your files anytime, anywhere. You can use free web versions of productivity apps like Word, Excel, and PowerPoint to collaborate in real time or work offline. This means seamless collaboration with friends and family.
You can also download the OneDrive app to stay connected from anywhere.
Easily Transfer your Info to a New PC
Now that you’ve backed up your PC, you’ll be able to more easily transfer your info to a new one whenever you’re ready. The Windows Backup app automatically works in the background to remember your latest changes. When you set up a new PC, we’ll ask you to sign in using the Microsoft account from your backup, and we’ll handle the rest. You’ll find your important files and some of your settings and apps restored to your new PC for a smooth start and a familiar feel.
You’re Protected if Anything Happens to Your PC
With your documents, photos, music, and videos backed up, you don’t need to worry about losing important files and memories if something happens to your PC.
Windows 11’s new Backup app: Everything you need to know
With a new app that Microsoft has integrated directly into Windows 10 and Windows 11, you will be able to back up your data to the cloud and synchronize it with other systems. This works in a similar way to macOS with iCloud.
Microsoft is providing a new backup app for Windows 11 and Windows 10 that you can use to back up your data. The app is available free of charge in Windows 10 and Windows 11, but does not offer much flexibility.
Only OneDrive is generally suitable as a backup destination. Anyone who relies on cloud storage can therefore benefit from the new app. Anyone who does not use a Microsoft account or does not want to back up data to OneDrive will not benefit from this app.
Basically, Microsoft is expanding the backup and synchronization options of Windows 10/11 with the app, similar to Apple in macOS and iOS/iPadOS. Users can also use the new app to protect themselves against data loss due to ransomware. You can also use the app to keep multiple PCs and their data and settings synchronized.
Windows backup runs in parallel with the OneDrive client
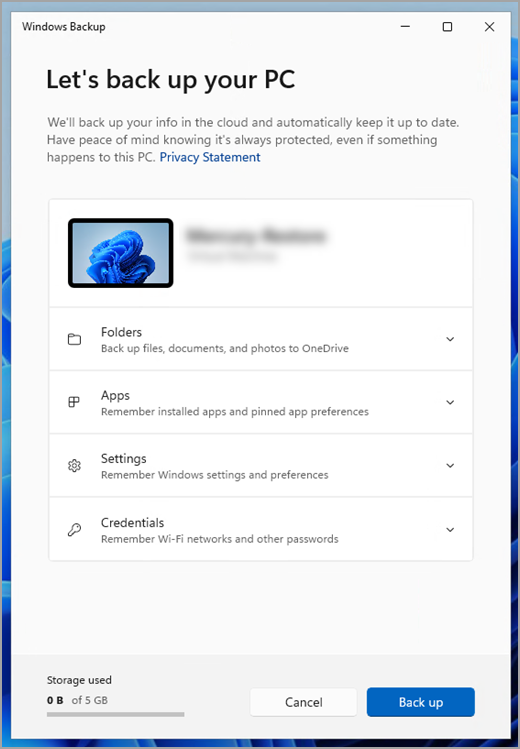
To use the new backup app, open the app “Windows Backup” from the Start menu. Various options are available here that you can use to back up a Windows computer. The settings here are independent of the OneDrive client.
You can therefore continue to synchronize a directory on the local computer with OneDrive in the future. If the app does not appear in the list, you should update your Windows system; integration takes place via a Windows update.
The new Windows Backup can back up various folders on the local computer to OneDrive. Incidentally, this works in parallel with other backup options and also in parallel with the Windows 7 backup that is still available in Windows 10 and Windows 11. The new Windows Backup app can only use OneDrive as the backup destination, while you can also use the classic app to back up data to external drives or the network.
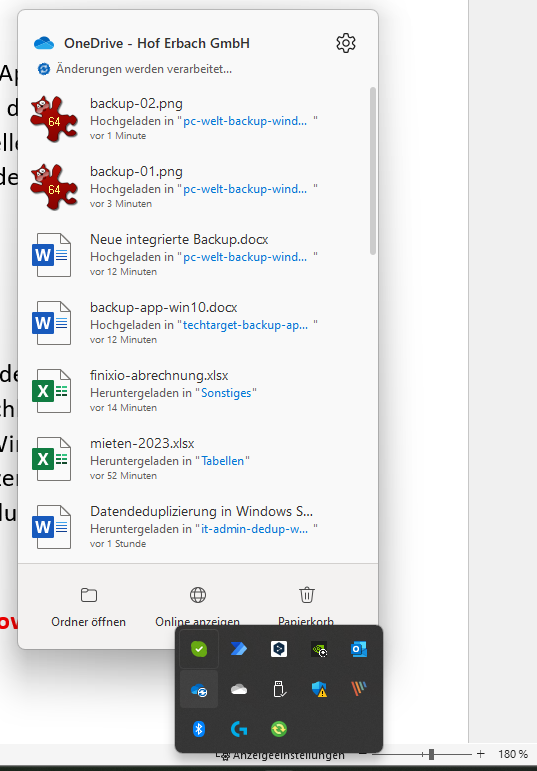
The OneDrive client in Windows 10 and Windows 11 can still be controlled via its icon in the system tray area of the taskbar. In the future, you will therefore be able to synchronize individual files in OneDrive using various tools, back up various folders, and back up data locally or to the network using the classic backup. These three options are not mutually exclusive, but run in parallel.
Thomas Joos
All three apps therefore have their justification and enable very flexible backup methods for Windows workstations with Windows 10 and Windows 11. The Windows Backup app is also ideal if you want to migrate from Windows 10 to Windows 11 or to a new PC with Windows 10 or Windows 11.
First steps with the Windows backup
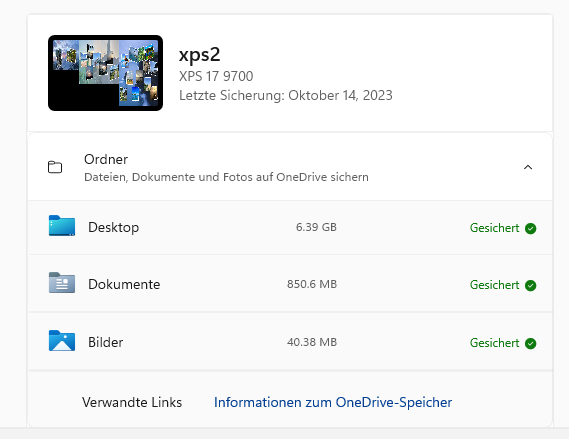
After starting Windows Backup, you will first see the name and type of your PC at the top and when the last backup was performed. Under “Folders” you can see which folders on the computer were covered by the Windows backup and whether they are currently backed up. You can also see how much storage space the backup of this folder currently requires in the cloud. You can see the available storage space in OneDrive at the bottom of the window.
Thomas Joos
Under “Apps” you can see whether settings and the app list of the PC are synchronized with the cloud. You can also check under “Settings” whether the Windows backup also synchronizes options such as customizations. If you log in to another PC with the same Microsoft account, the data is also immediately available here.
The same applies to data from Wi-Fi networks or login data, including passwords. The Windows backup can also save this data to the cloud so that it is available on other PCs. Start the backup with the “Backup” button.
Configure the Windows backup
You cannot customize the Windows backup directly in the Windows Backup app. You can only monitor and start the backup here. To make adjustments, open the settings in Windows 10 or Windows 11 and go to Accounts > Windows Backup.
Microsoft
Use “Manage synchronization settings” to specify which local folders you want to back up to OneDrive. Here you can also see the required storage space. You only need to activate the slider for the respective folder at this point.
You can also specify whether you want to back up your settings and the app by activating the respective option under Accounts > Windows backup.
Windows backup protects against ransomware
Foundry
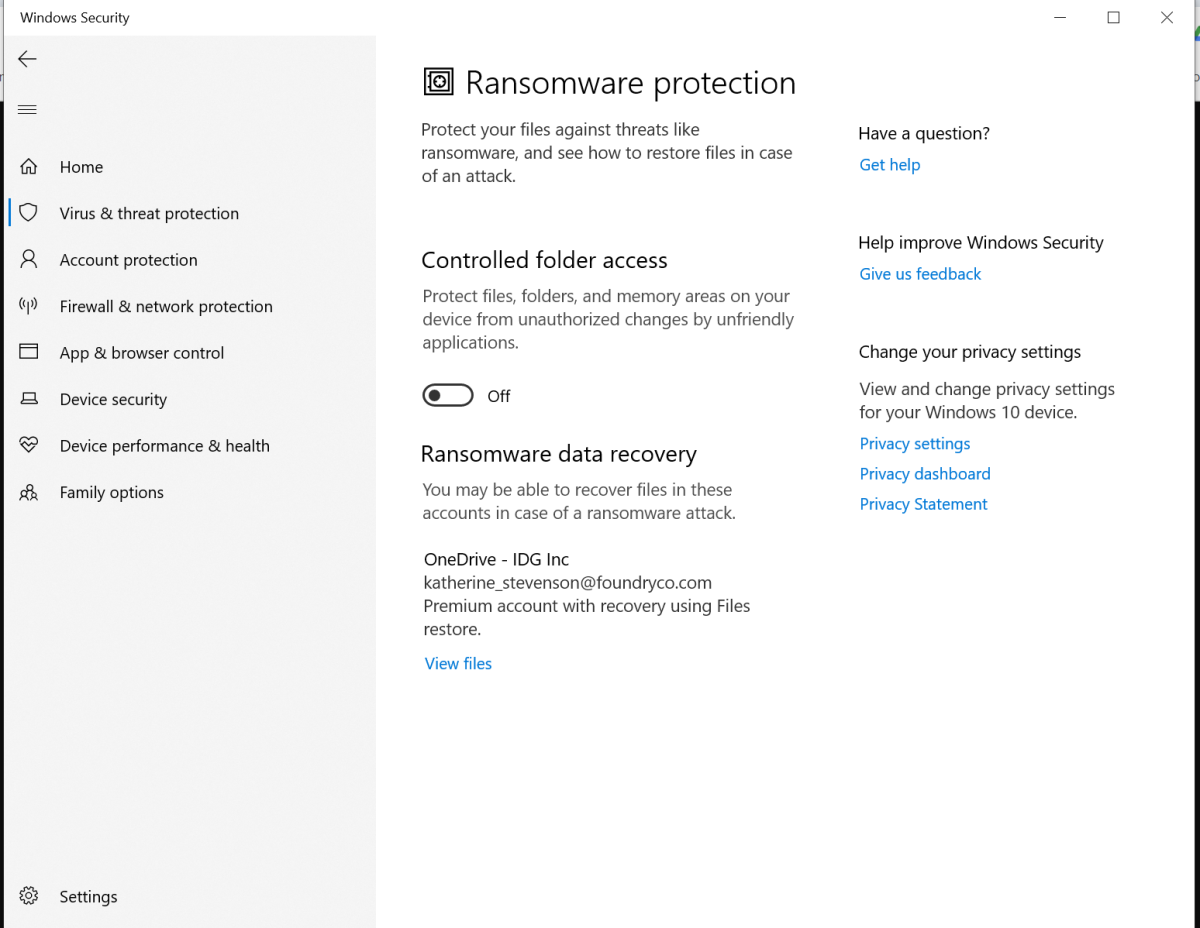
By synchronizing your important data with OneDrive, you can also protect yourself against ransomware with the new app. Open the Windows Security app and go to Virus and threat protection > Ransomware protection > Manage ransomware protection, you can use “Show files” to go directly to the files in OneDrive to restore them if a computer has been attacked by ransomware.
Additional settings are not necessary as the Windows Backup app takes over the ransomware protection options of the Windows Security app.
The app is very simple and can be set up quickly. If you use a Microsoft account and are prepared to back up your data to the cloud, the Windows Backup app is a useful backup and synchronization app with on-board tools.
External USB/Thunderbolt drives are a super-convenient way to quickly back up your important files, as well as store any data that you don’t need on your computer’s internal storage. They’re also an extremely handy way to transport data between locations and devices.
While any of these would be a great reason to pick up an external drive, the advantages of having reliable backup is the number-one reason your setup isn’t complete without one. Why? Chances are you have important data on your PC that you can’t afford to lose. To protect that data you’ll want to do two things: store it off-site on the cloud if possible and back it up to an external drive. This way you ensure your data is completely safe should anything go wrong with your computer.
While we highly recommend that you consider cloud storage as a backup option, restoring from local storage is generally far, far faster than pulling your data down from the cloud. Therefore, an external drive should be your primary hedge against disaster.
Why you should trust us: We’re PCWorld. We’ve been putting computer hardware through its paces for decades. We’ve seen it all and we know how to root out a drive’s strengths and weaknesses, using a combination of rigorous benchmark testing and real-world hands-on use. Below we offer our expert recommendations on the best external drives for everything from blazing-fast performance, to budget options, to portability, and more.
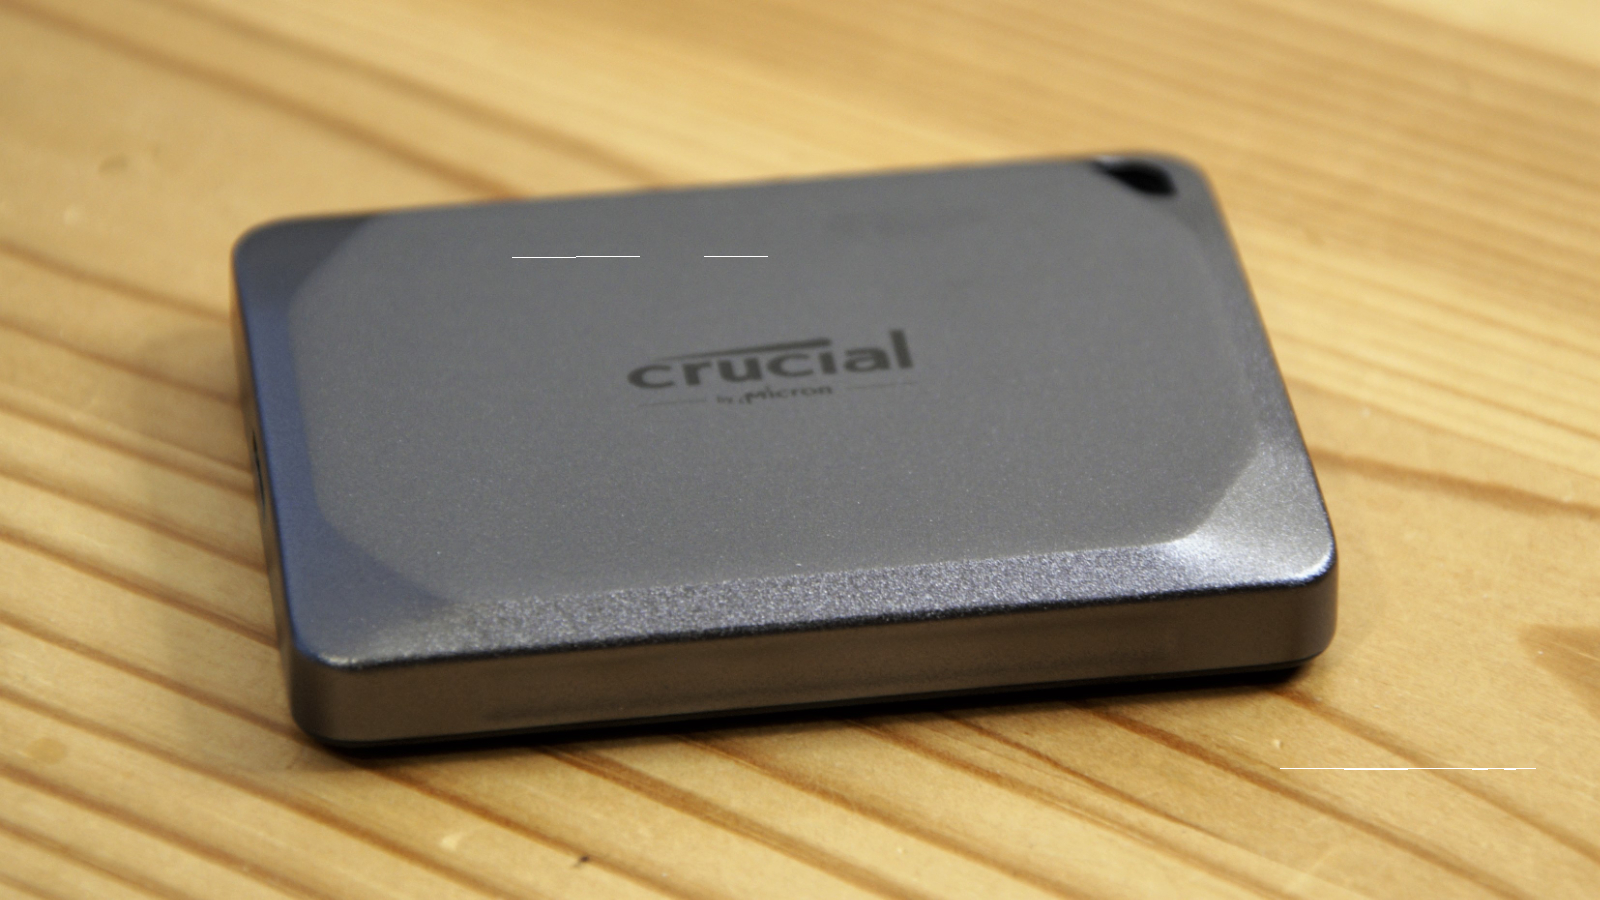
Crucial X9 Pro – Best external SSD overall
Pros
Super small form factor
Great 10Gbps performance
Handsome design
Cons
Not the least expensive 10Gbps SSD available
Price When Reviewed: 1TB:$79.99 I 2TB:$129.99 I 4TB:$239.99
Not everyone wants or even needs 20Gbps USB drive performance, which comes at a price premium anyway. The Crucial X9 strikes a compelling balance between top-shelf performance and affordability that should please the majority of users. In our benchmark tests, it traded top scores with the SK Hynix Beetle (or runner-up choice below), but at a significantly lower cost. Making it an indisputable win-win for consumers.
It’s also handsome, described by our reviewer as “a svelte object of desire.” More importantly, it feels well made, and is rated for IP55 dust and spray resistance, so you don’t have to baby this portable drive when you take it out.
As stated above, the SK Hynix Beetle X31 is every bit the performer as our top pick in the 10Gbps realm, with the two enjoying an equal number of wins in our benchmarks and handily besting the competition. But where the SK Hynix loses its edge is on price. Right now, it’s about $13 more for 1TB than the Crucial X9.
It’s also more blinged out. Peep that gold scarab-inspired exterior. It will sit proudly on any desk, and for some buyers that might make the extra cost worth it.
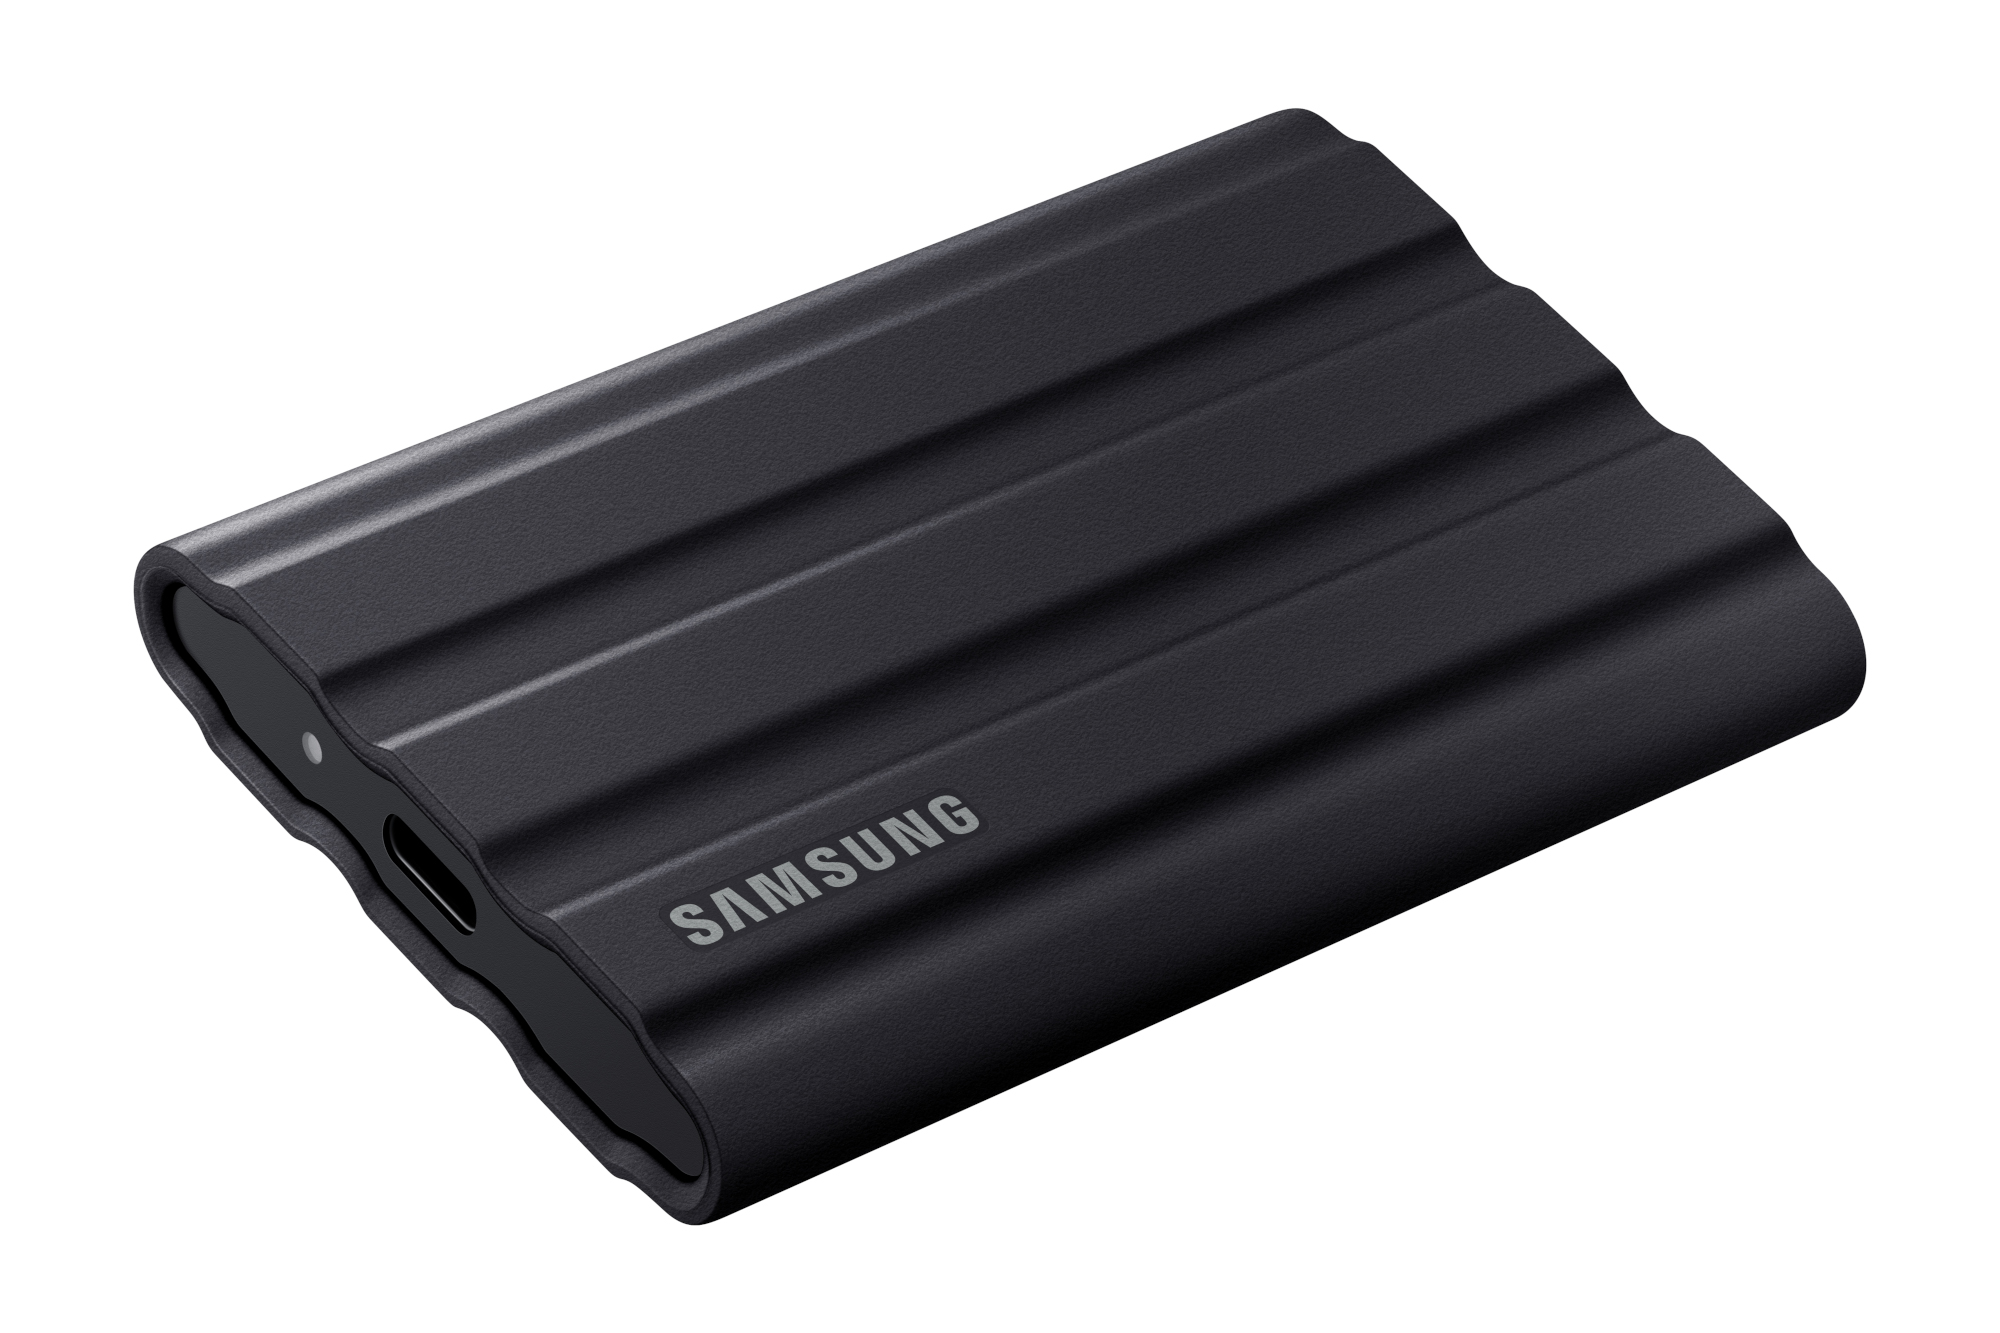
Samsung T7 Shield 4TB – Best high-capacity performance drive
Pros
Fast 1GBps sustained transfers
Excellent real world performance
Vast 4TB capacity
Svelte and handsome
Cons
Not cheap
Small 4K performance glitch under CrystalDiskMark 8 writing 4K files
Once our top pick overall, the Samsung T7 Shield has been overtake in raw speeds by the two newcomers above. But if the 2TB limit of the drives above has you feeling too confined, the T7 Shield 4TB is a good option.
The T7 Shield also leans into physical protection, with an IP65 ratings against particulate matter and water spray. Going hiking with your data? A T7 Shield is a good choice, and you can secure it with software-based password protection in lieu of a fingerprint.
With its top-tier speeds and large capacity, the T7 4TB model is capable of handling the largest end-user data sets on the go.
The Crucial X6 Portable SSD is square to be hip (search Huey Lewis). Or placed in your hip pocket, at any rate. In a sea of portable SSDs whose shape and sometimes sharp edges makes them a literal pain when situated in your shirt or trousers, the thin, rounded-edge X6 is a sigh of relief. It’s not state-of-the-art fast, but it’s fast enough for most users and extremely affordable.
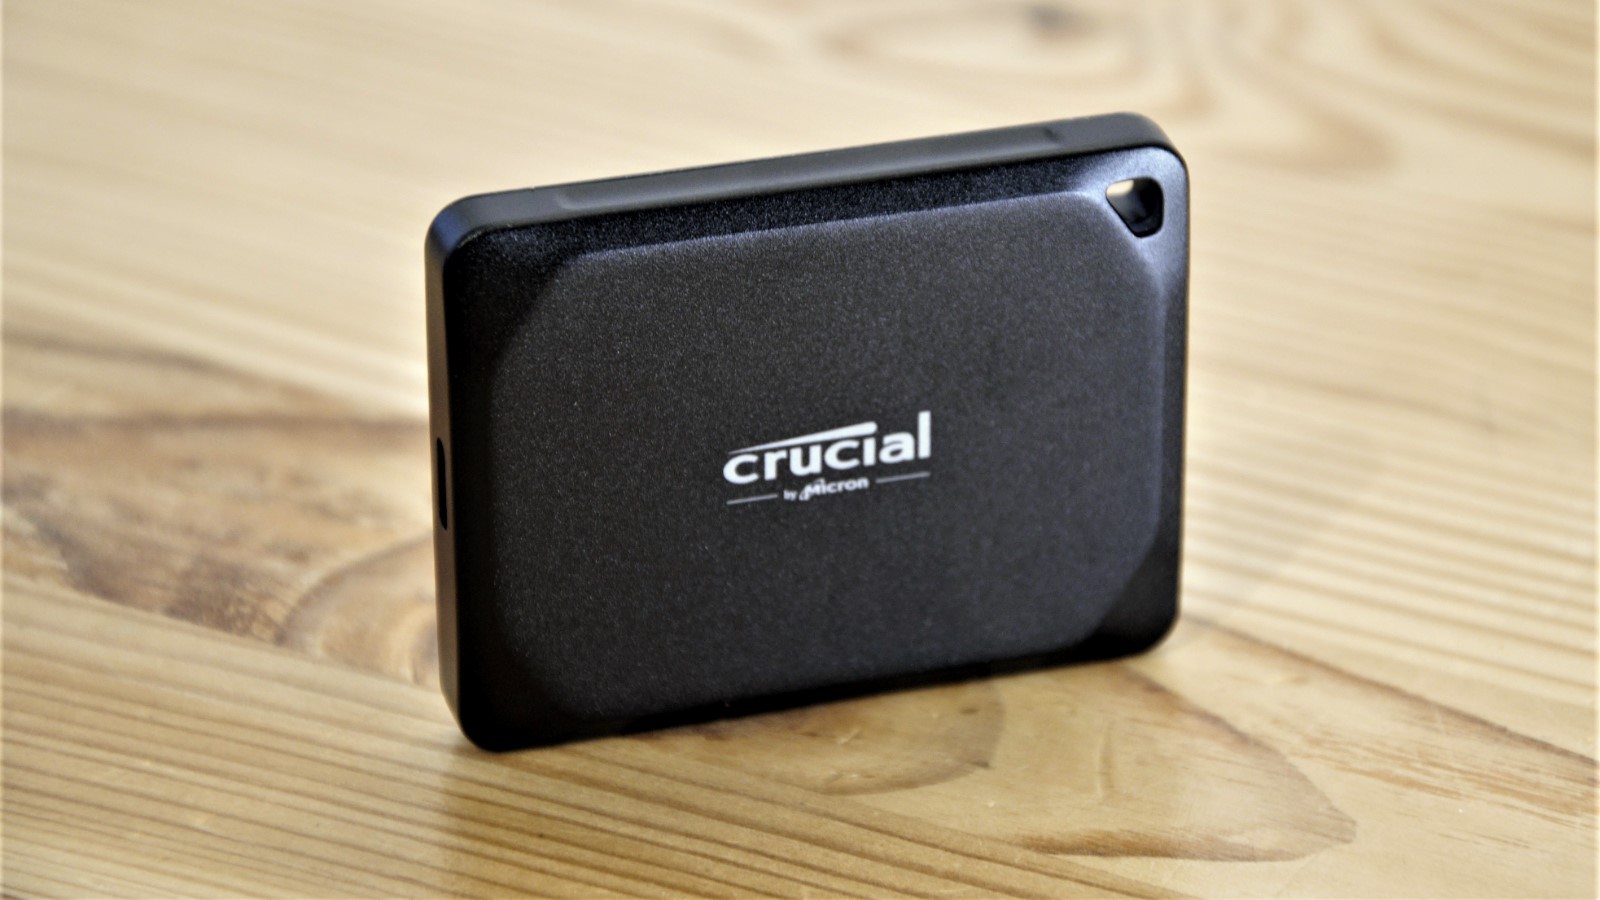
If you’ve got a 20Gbps USB port, you can’t get better performance than this drive (short of a much pricier Thunderbolt option). This makes it perfect for gaming—where these days a single game can soak up 50GB or 100GB—or really any job involving large amounts of data that need to be transferred fast.
The Crucial X10 was most impressive in our real-world benchmarks, doing exceptionally well in 48GB and 450GB reads and writes, where it beat all 20Gbps contenders and was surprisingly neck-and-neck with a Thunderbolt 3 competitor. (Learn more about how we evaluate the best external SSD for gaming.)
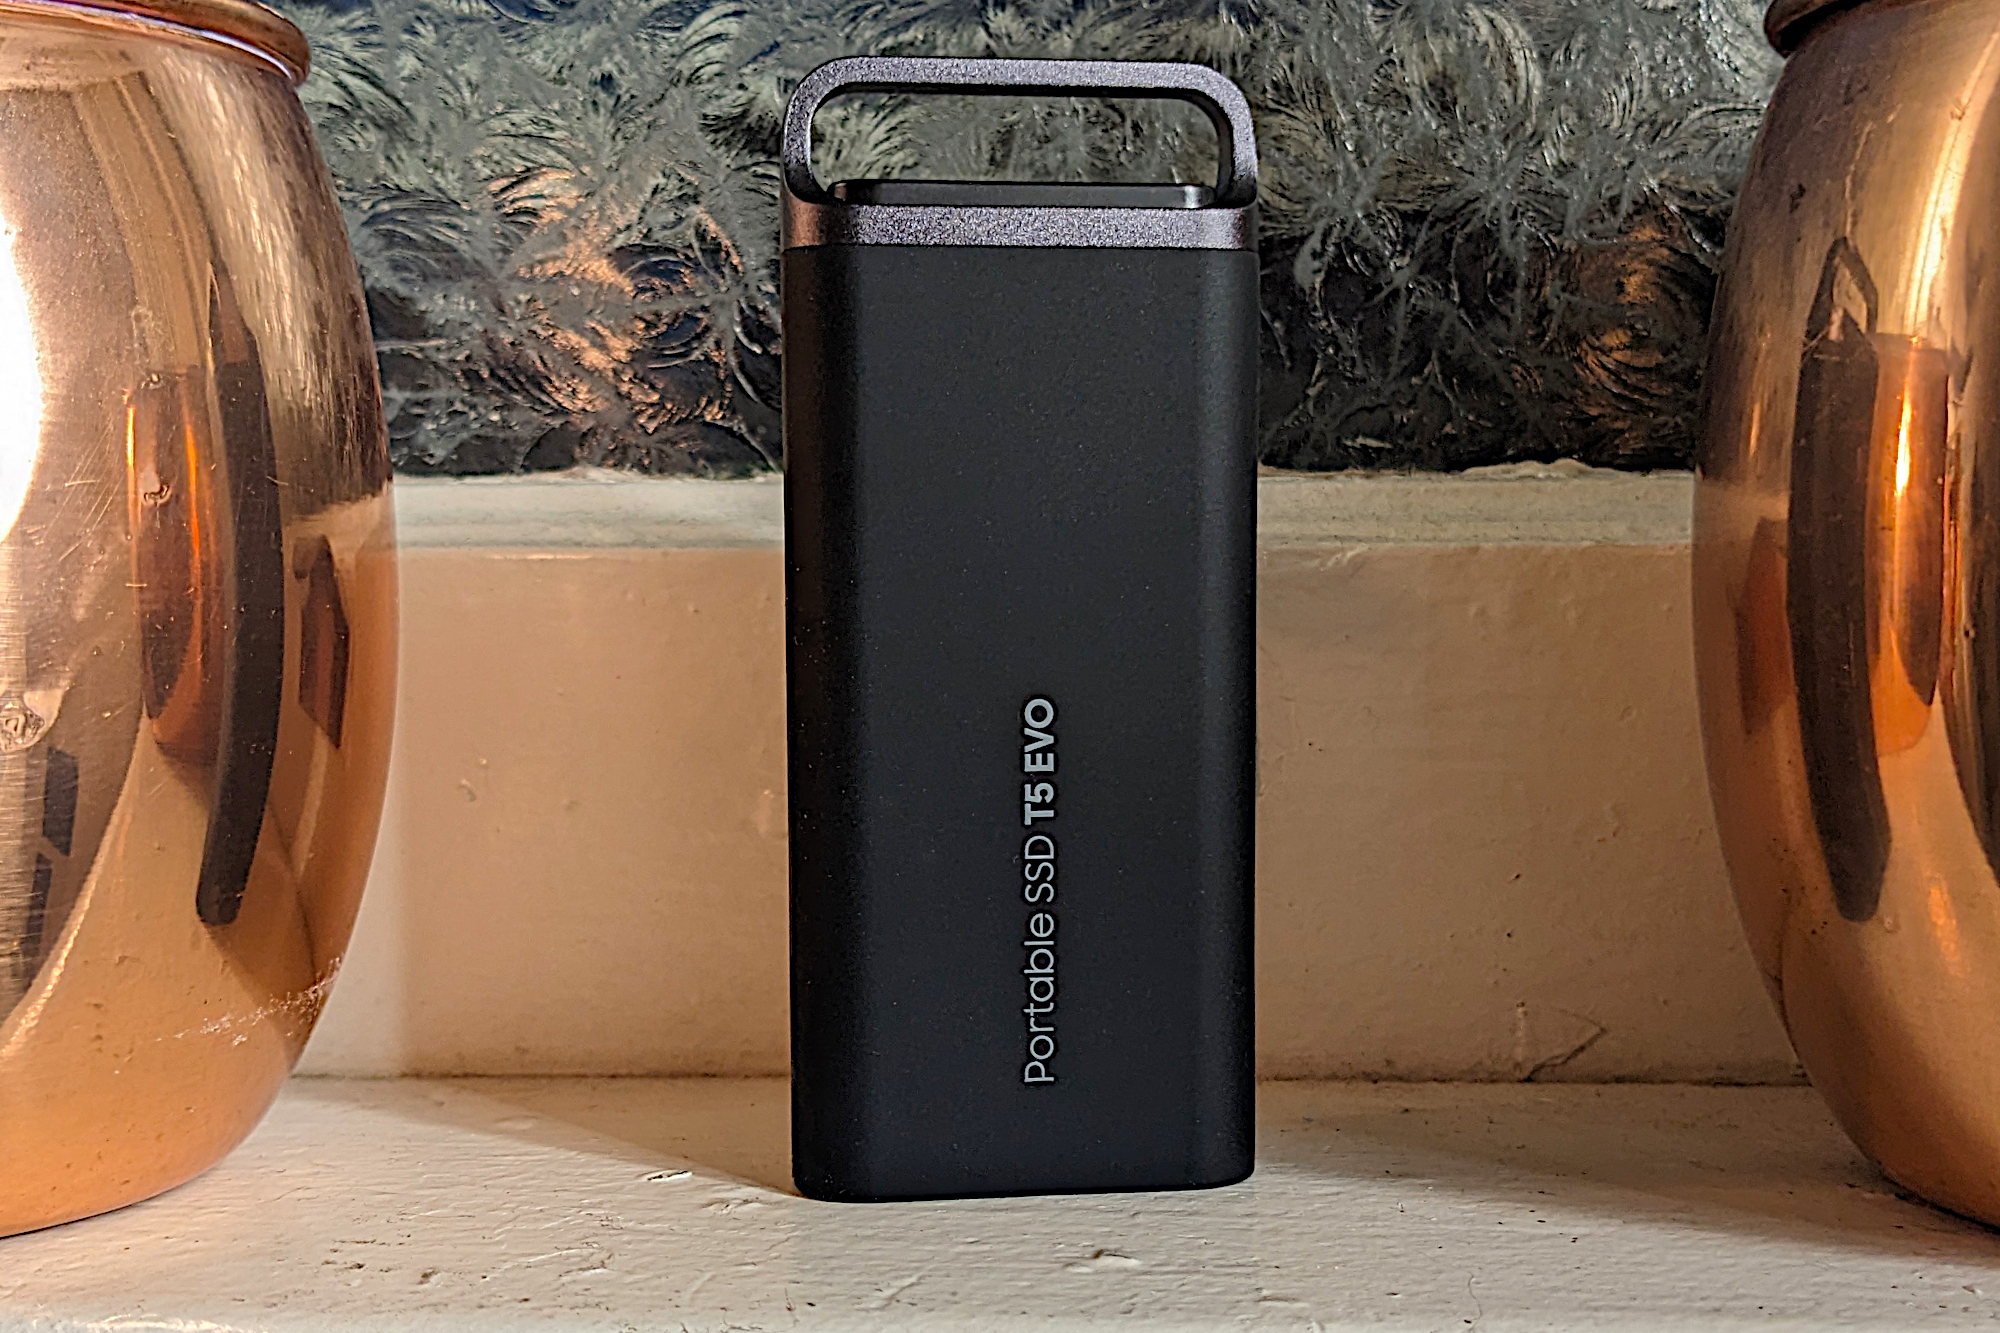
Sometimes you just need space, a lot of space. Maybe you’re a video editor or creative professional who needs to store massive media files. Or maybe you just have the world’s largest library of cat videos. No judgment. Either way, you need the Samsung T5 EVO. This rugged bad boy comes with a whopping 8TB of storage space. You read that right — 8 terabytes. That should be enough no matter your needs, feline or otherwise.
The T5 EVO has an attractive design with a rugged silicon-like exterior that is rated up to an impressive 1500Gs. It isn’t the fastest drive since it uses USB 3.2 (Gen 1), which means data transfer rates will be capped at 550MBps. But the T5 EVO is all about capacity rather than stellar performance anyways. For affordable capacity from a trustworthy brand, the Samsung T5 EVO should be your go-to.
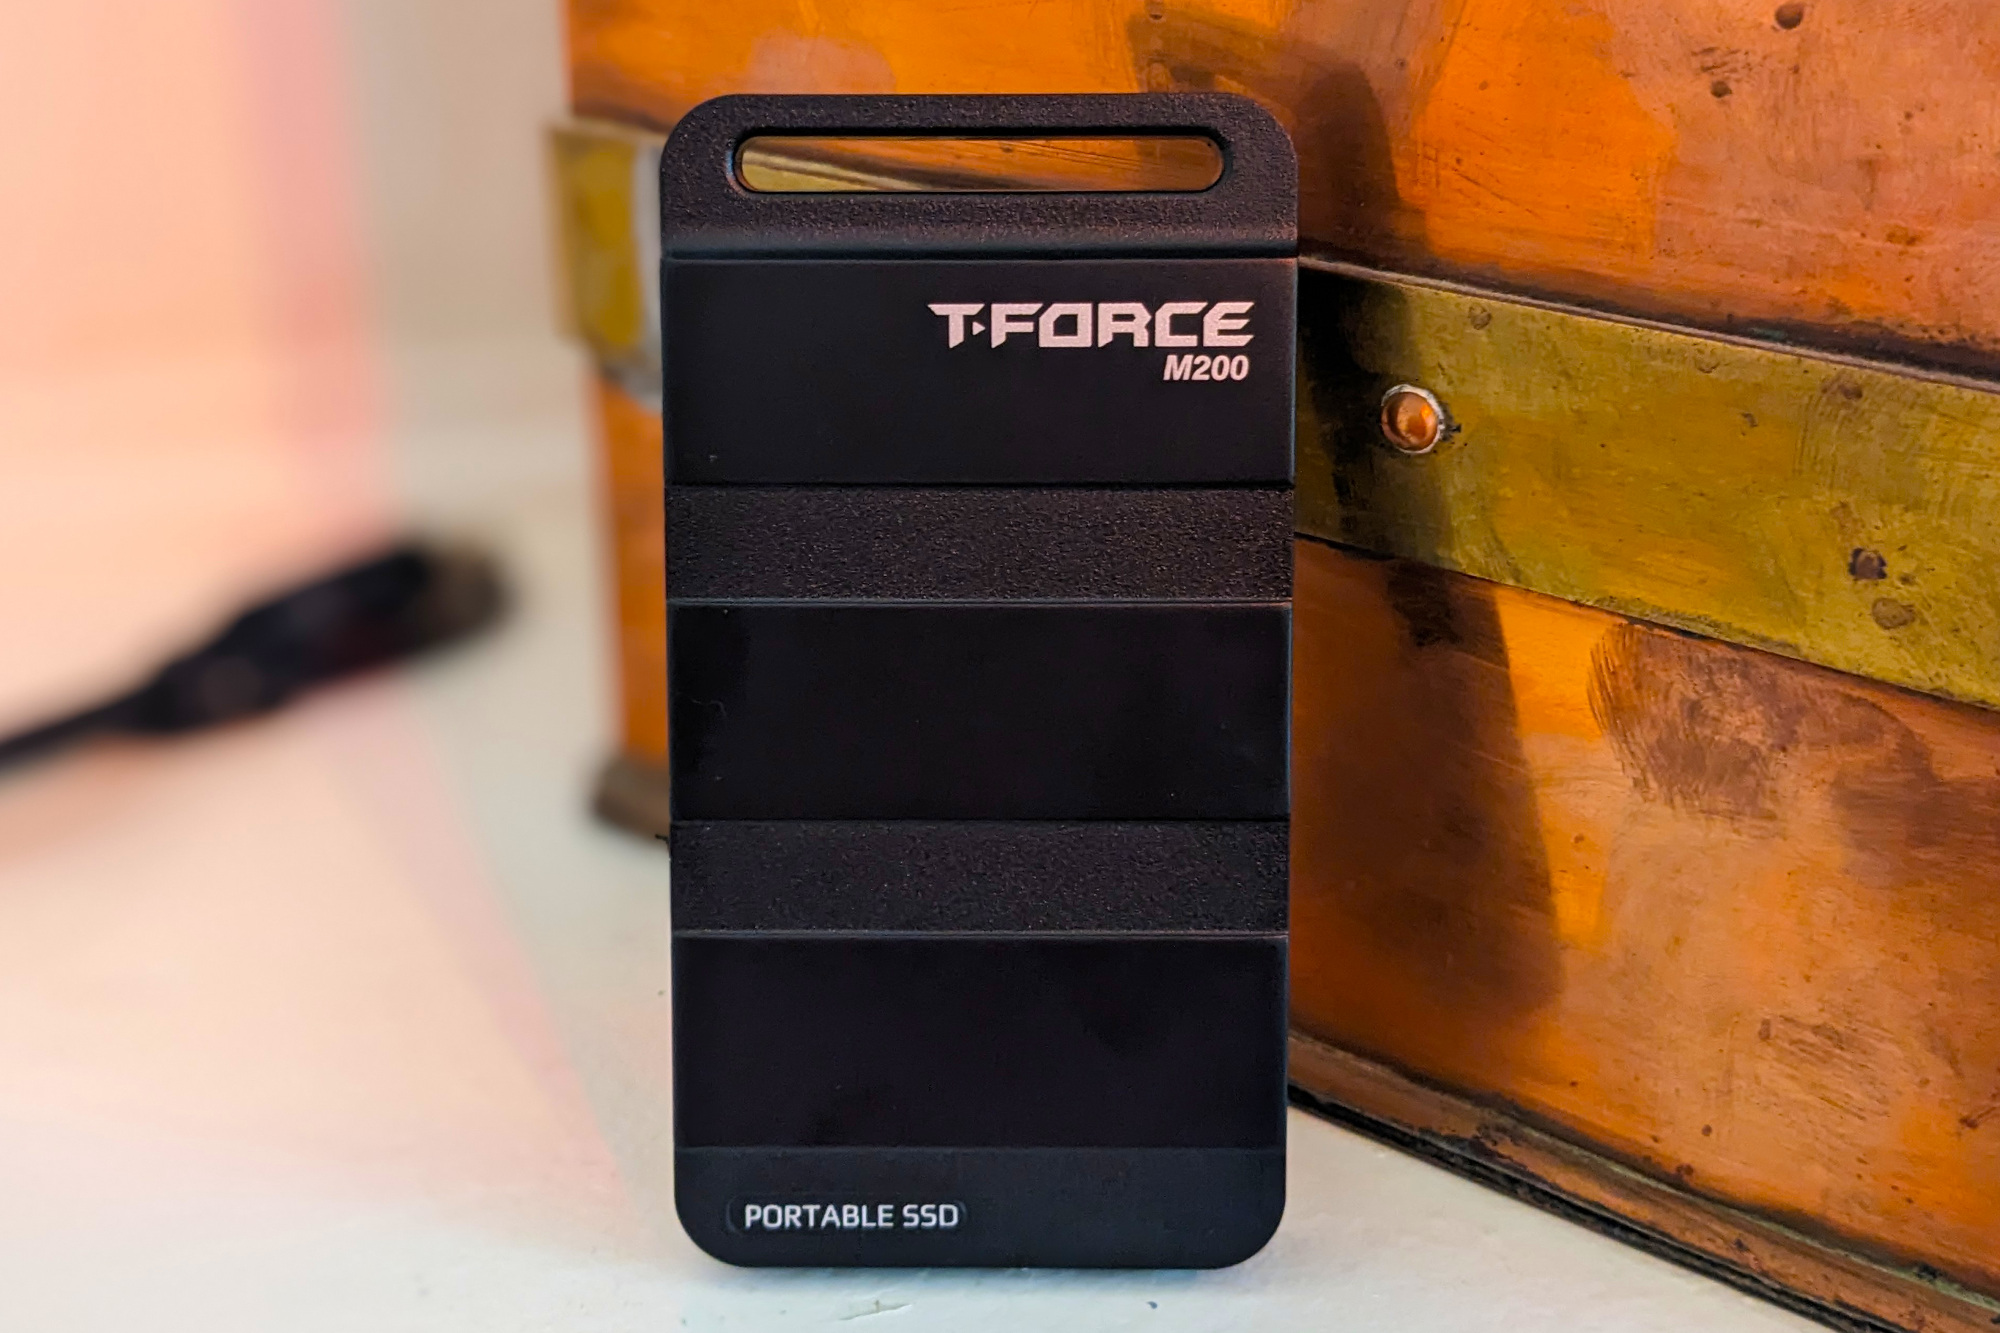
Teamgroup M200 – Best budget 20Gbps drive
Pros
Fast everyday performance
Available in up to 8TB (eventually) capacity
Attractively styled
Cons
No TBW rating
Company will change components if shortages demand
Writes slow to 200MBps off cache
Price When Reviewed: $40 for 256GB | $58 for 512GB | $260 for 2TB | $300 for 4TB
Rated for 20Gbps and selling for $90 with 1TB of storage, the Teamgroup M200 is an attractive (in a military fashion) external drive for the budget-conscious performance enthusiast.
It might not be as cheap as the Crucial X6, but for the extra outlay you get outstanding everyday performance — in many tests, it’s the fastest 20Gbps drive we’ve ever tested. At just 4.13-inches long and 2.18-inches wide and weighing under 3 ounces, it’s also extremely portable and its slick styling will appeal to gamers.
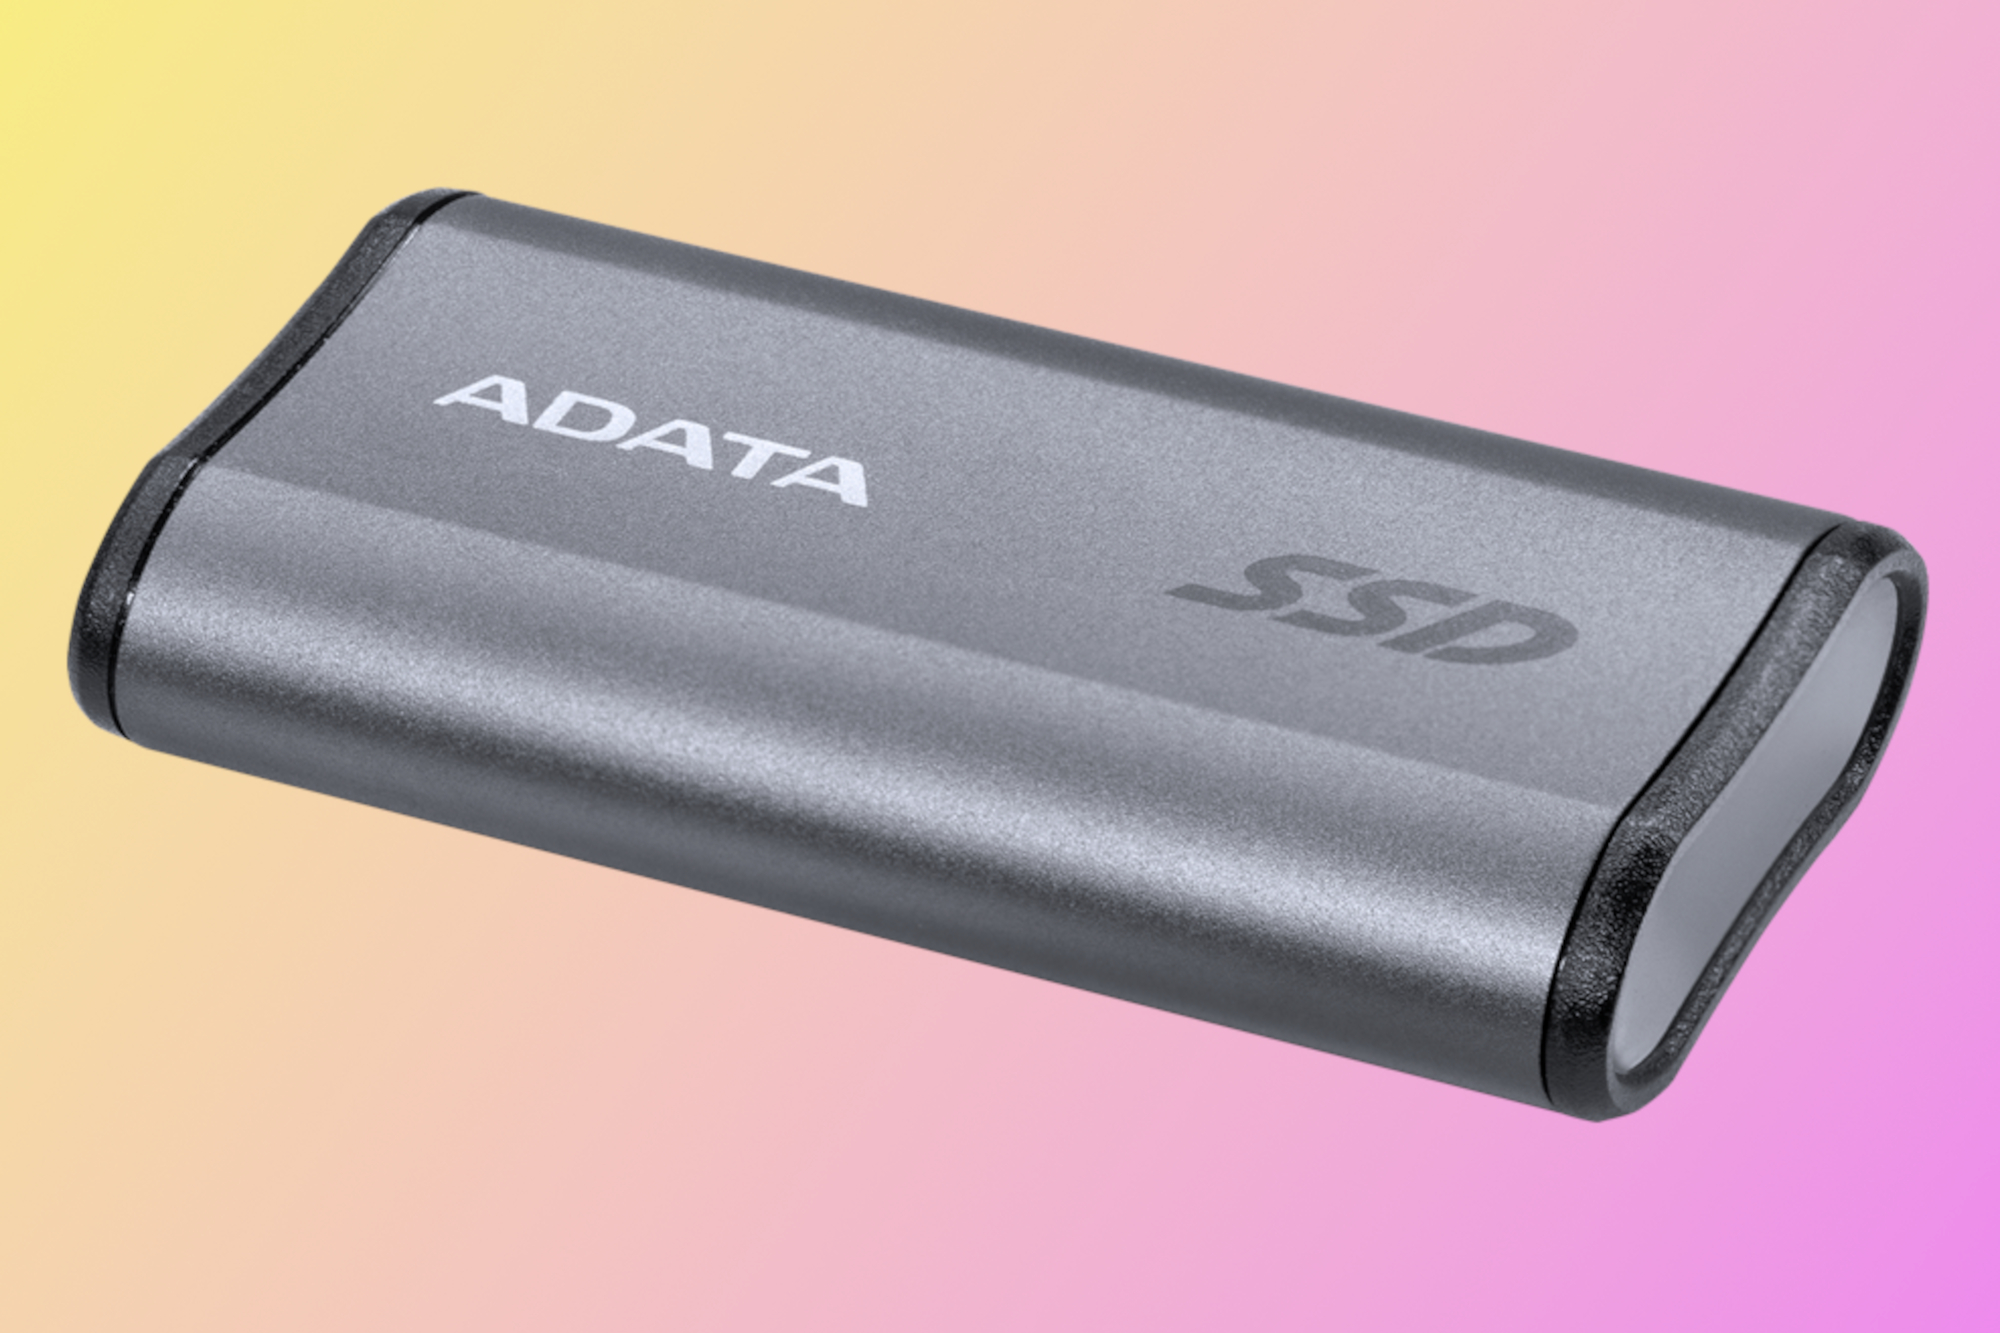
No external SSD we’ve seen can match Adata’s Elite SE880 for portability. Indeed, measuring only 2.55 inches long, 1.38 inches wide, and 0.48 inches thick, it reminds you more of a USB thumb drive than your standard external SSD. It also weighs a mere 1.1 ounces, so it vanishes from your consciousness in the pocket.
In real-world 48GB transfer tests, the Elite SD880 beat out quite a few of its competitors, though it lost significant ground in the longer 450GB write test. Photo and video pros with large files to transfer might want to consider speedier options.
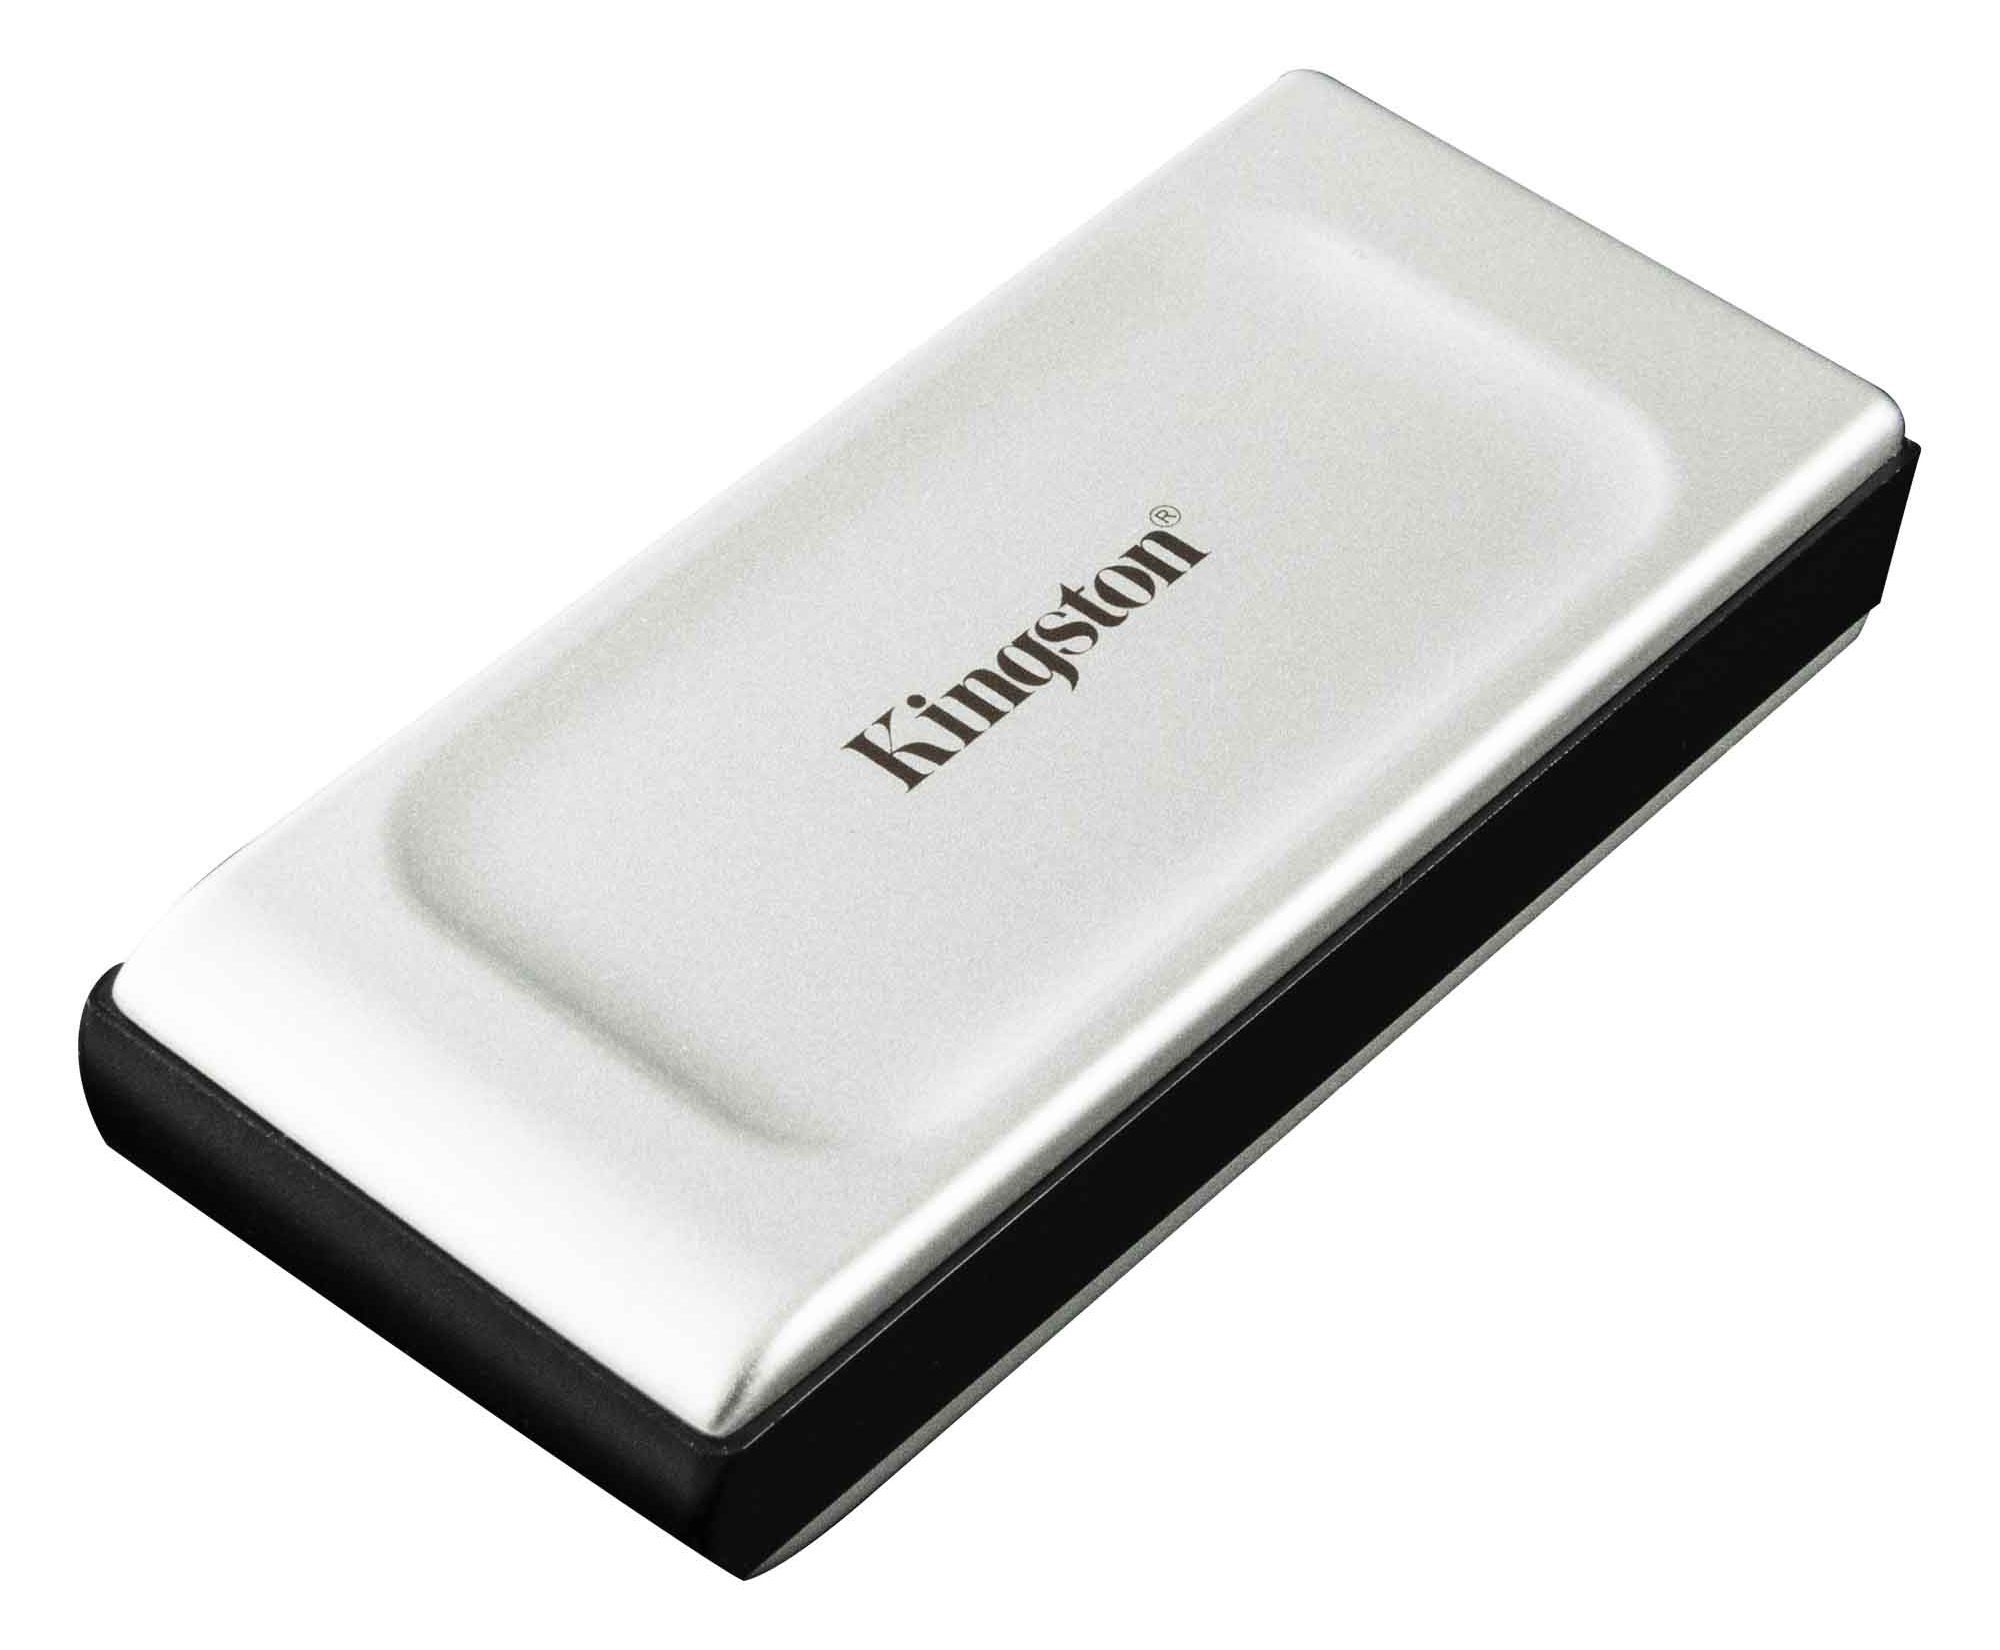
The Kingston XS2000 is an admirable blend of size, capacity, speed, and affordability. With up to 4TB in capacity, it is one of the most capacious drives that still fits in smaller pockets.
The XS2000 is a 20Gbps USB drive, and while it lagged as a reader compared to most of the 20Gbps competition, it beats the pants off of the 10Gbps drives in synthetic benchmarks and our 48GB transfers. The 450GB write was very slow, but overall, it’s a decently fast SSD and a solid product that offers a ton of storage in a very small form factor.
Note: Kingston sent us a updated version that solved its slow read performance in synthetic benchmarks. The 450GB write remained slow.
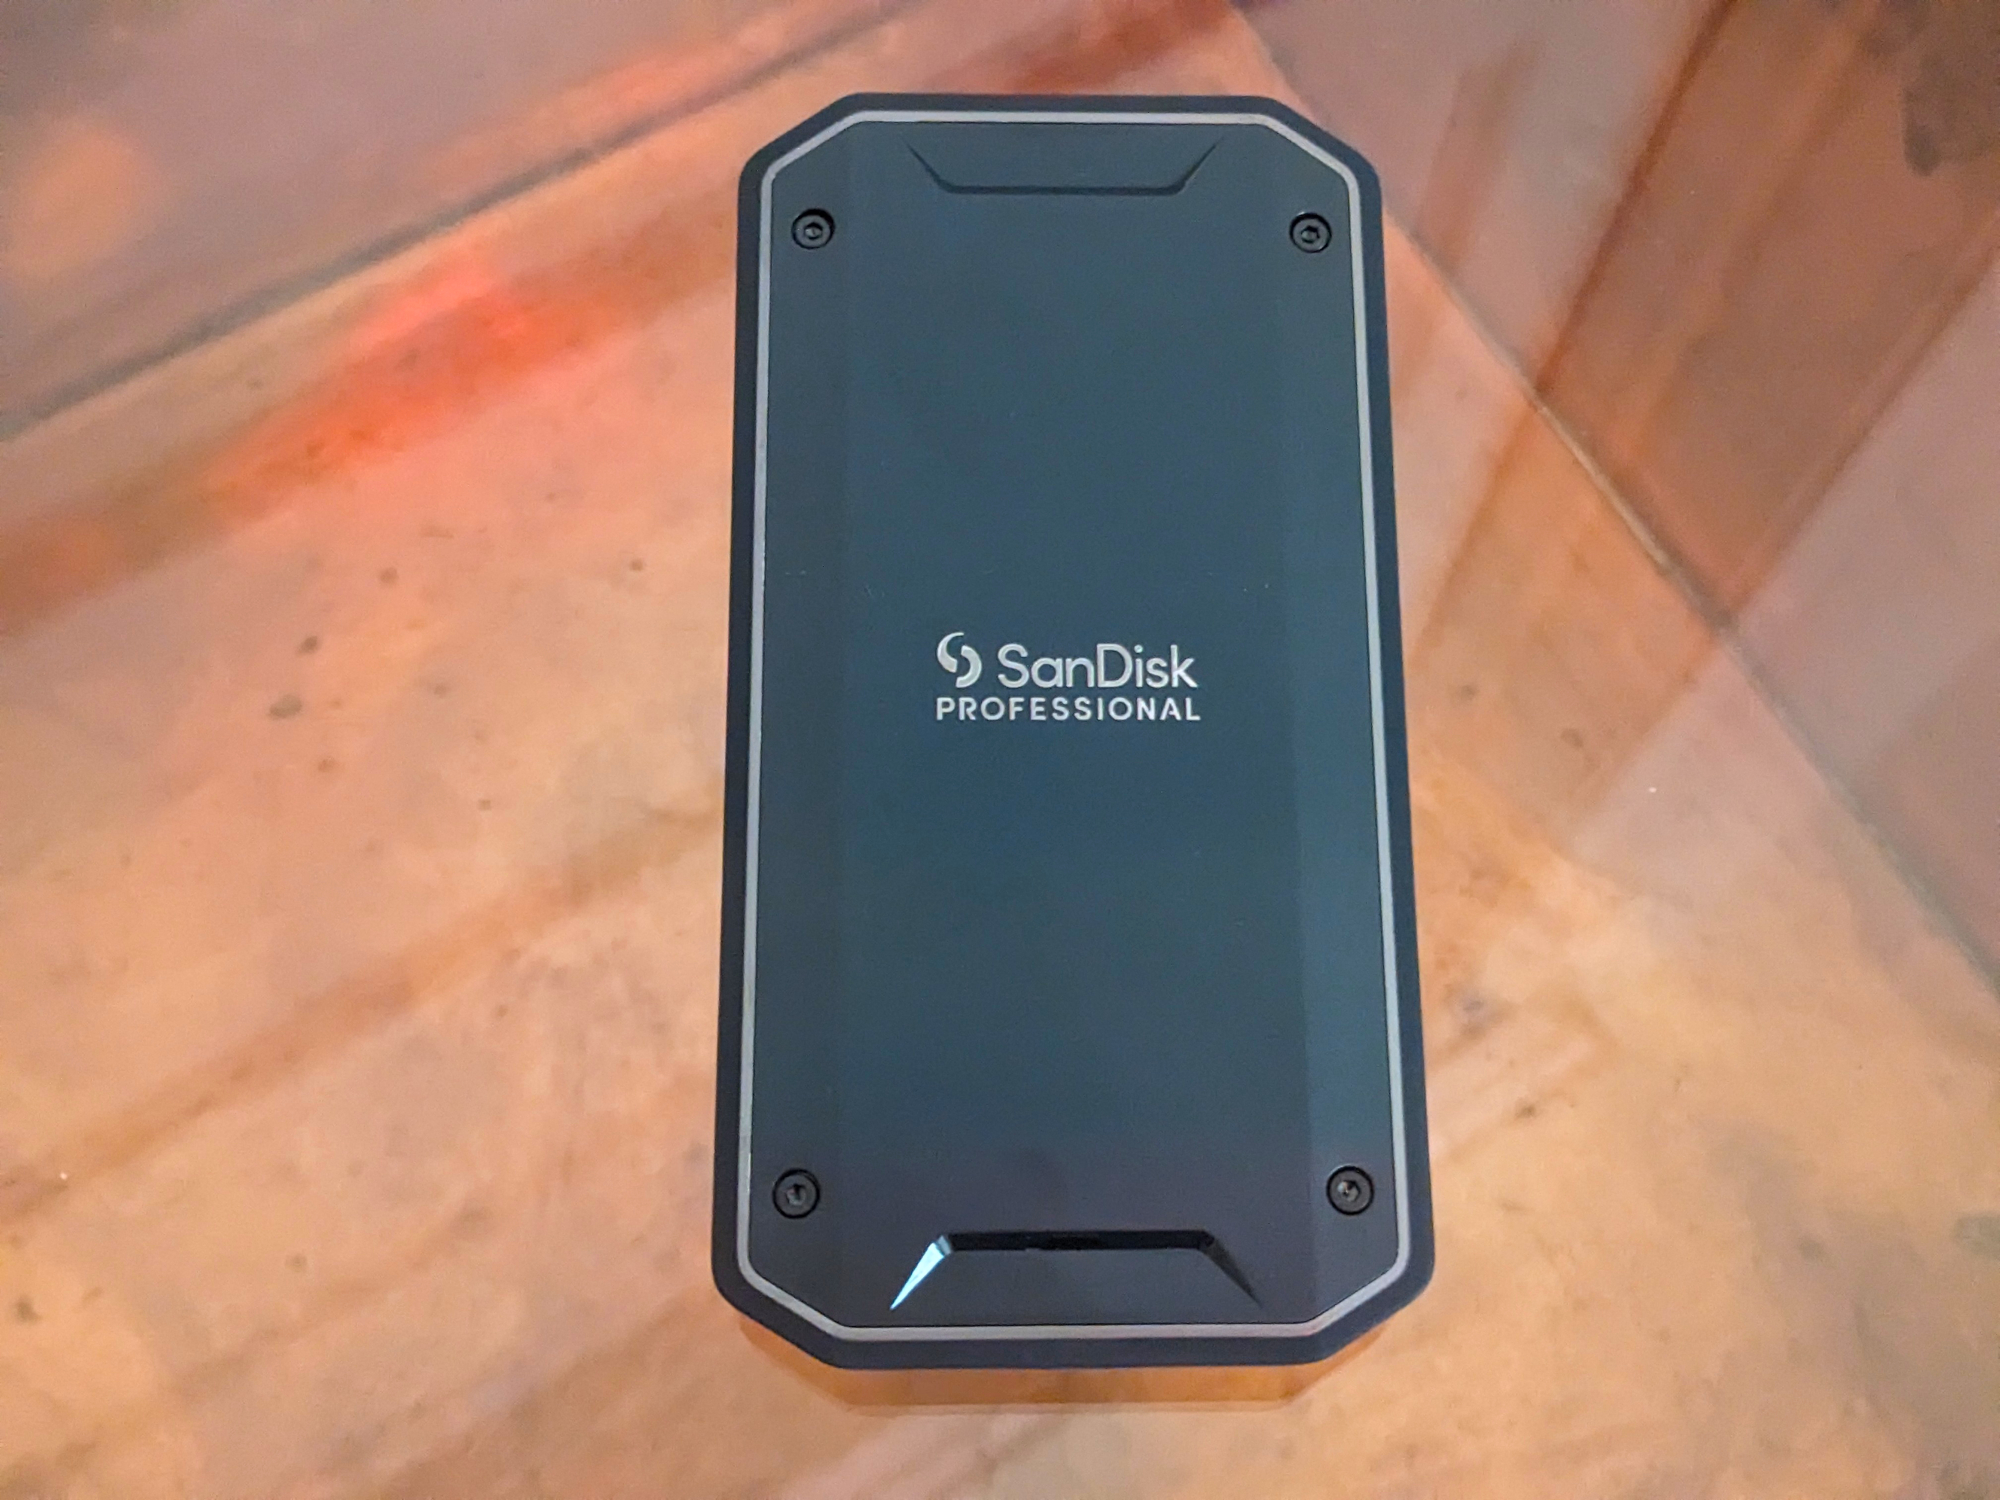
For anyone who wants Thunderbolt’s scintillating 40Gbps performance as well as the ability to connect via ubiquitous USB (10Gbps), the SanDisk Pro-G40 is the drive to buy — it’s the fastest dual-bus drive that we’ve ever tested. The drive dominated the competition when connected via Thunderbolt with outstanding 48GB and 450GB transfers, and via USB was on par with the fastest 10Gbps drives.
The Pro-G40 is also rated at IP68 for weather and dust resistance, meaning it should be able to handle outdoor adventures if you decide to travel with it in your backpack. It’s a rather pricey drive, but Thunderbolt drives are never “cheap.” They are, however, absolutely worth it if pennies don’t matter as much as minutes. A fantastic drive.
If your primary need from an external drive is data backup, WD’s My Passport 5TB is for you. You want to know why? It’s right there in the name — that extra 1TB can be invaluable in this age of 4K/8K. Furthermore, you don’t need the speed of an SSD to perform maintenance backups, which can be scheduled for times that create the least possible disruption. And by going with a hard drive over SSD, you can save loads of money.
What you need to know before you buy
Yes, USB4 will provide the same massive throughput as Thunderbolt 3 at lower prices eventually, and likely far more products too.
Capacity versus price
For most consumers, the primary shopping criteria for external storage are capacity and price. However, while you might think that the lowest-cost drives provide the most value–they don’t. In fact, dollar for dollar, cheaper low-capacity drives have always been the worst deal in terms of price per terabyte.
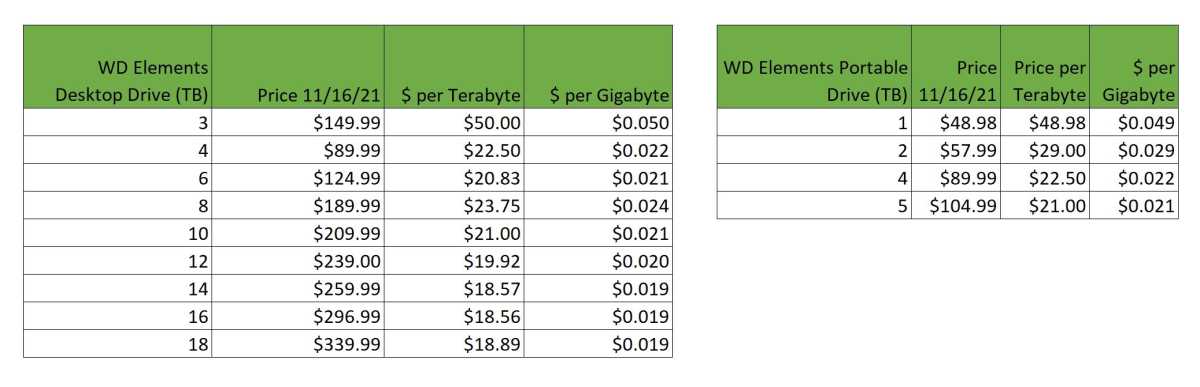
You can see the phenomena in the charts below where we compare the popular WD Elements desktop hard drive’s available capacities and prices. You’re paying more than twice as much per terabyte for the lowest-capacity drive versus the next step up. It’s almost as bad on the WD Elements Portable drive.
The worst value for an external hard drive is typically the lowest-capacity drive.
IDG
The best “value,” as you can see, typically means the most capacious hard drives. But it also means higher total cost, and not everyone needs maximum capacity.
How much capacity do you need?
So how much storage do you actually need? For backup, we recommend a drive that’s at least twice the capacity of the total amount of data residing on your PC’s internal storage.
If you have 1TB of storage in your PC, a 2TB drive allows you to make a full backup while keeping previous versions, as well as additional differential and incremental backups. I.e., the larger the capacity, the more backups over a longer period of time you can keep, or the more PCs you can back up to the same drive.
While a desktop hard drive (read 3.5-inch) provides far more capacity (up to 26TB currently if you’re a data center), it also requires a power cable, weighs more, and generally won’t be as shock resistant as a portable 2.5-inch hard drive. The latter is designed to take bumps in a laptop, even when powered up. Then again, if you really want rugged–go the SSD route.
Interface
The vast majority of external drives today are USB drives. However, USB comes in many speeds: 5Gbps, 10Gbps, 20GBps, and—eventually with USB4—40Gbps as with Thunderbolt 3/4. Ignore the version number (3.x) and look for the speed.
The USB Forum has changed its nomenclature to indicate throughput speed—SuperSpeed USB 5Gbps (formerly USB 3.x gen 1), SuperSpeed USB 10Gbps (formerly USB 3.x gen 2), and SuperSpeed USB 20Gbps (formerly USB 3.2 2×2). For the sake of brevity (and our sanity), we generally shorten those to, for example, USB 10Gbps, 10Gbps USB, 10Gbps etc.
All USB hard drives use a slower standard, typically USB 5Gbps. No hard drive, unless combined with other drives in RAID 0 or above, can saturate even the 5Gbps interface (roughly 500MBps real-world after overhead). Because of that, you’ll never see one rated higher.
Where SuperSpeed 10Gbps/20Gbps, USB4, or Thunderbolt are of value is with the aforementioned RAID hard drive setups, or more likely—an SSD. USB 10Gbps is fast enough for most users, and getting cheaper by the week. A 10Gbps Samsung T7 Shield can be had for $80 in a 1TB capacity.
Faster USB 20Gbps (Gen 2×2) basically doubles speed but moves you into a higher-price bracket, with the Seagate Firecuda Gaming SSD costing $100 for only 500GB of storage. Although far faster than 5/10Gbps, there still aren’t a lot of USB 20Gbps/USB4 ports out there.
Thunderbolt 3 and the newer Thunderbolt 4 (almost exactly the same thing with stricter implementation requirements) are the highest-performing interfaces for external storage. The key negatives are the premium pricing and a general lack of compatibility with the far more popular USB.
That said, there are dual Thunderbolt/USB SSDs available such as the Sandisk Pro-G40. The G40 is pricey at $160 for 1TB, but a fantastic drive for those who can afford it. Pure Thunderbolt external SSDs can be even pricier, as they’re almost all sold by Mac-oriented boutique vendors such as OWC and Sabrent.
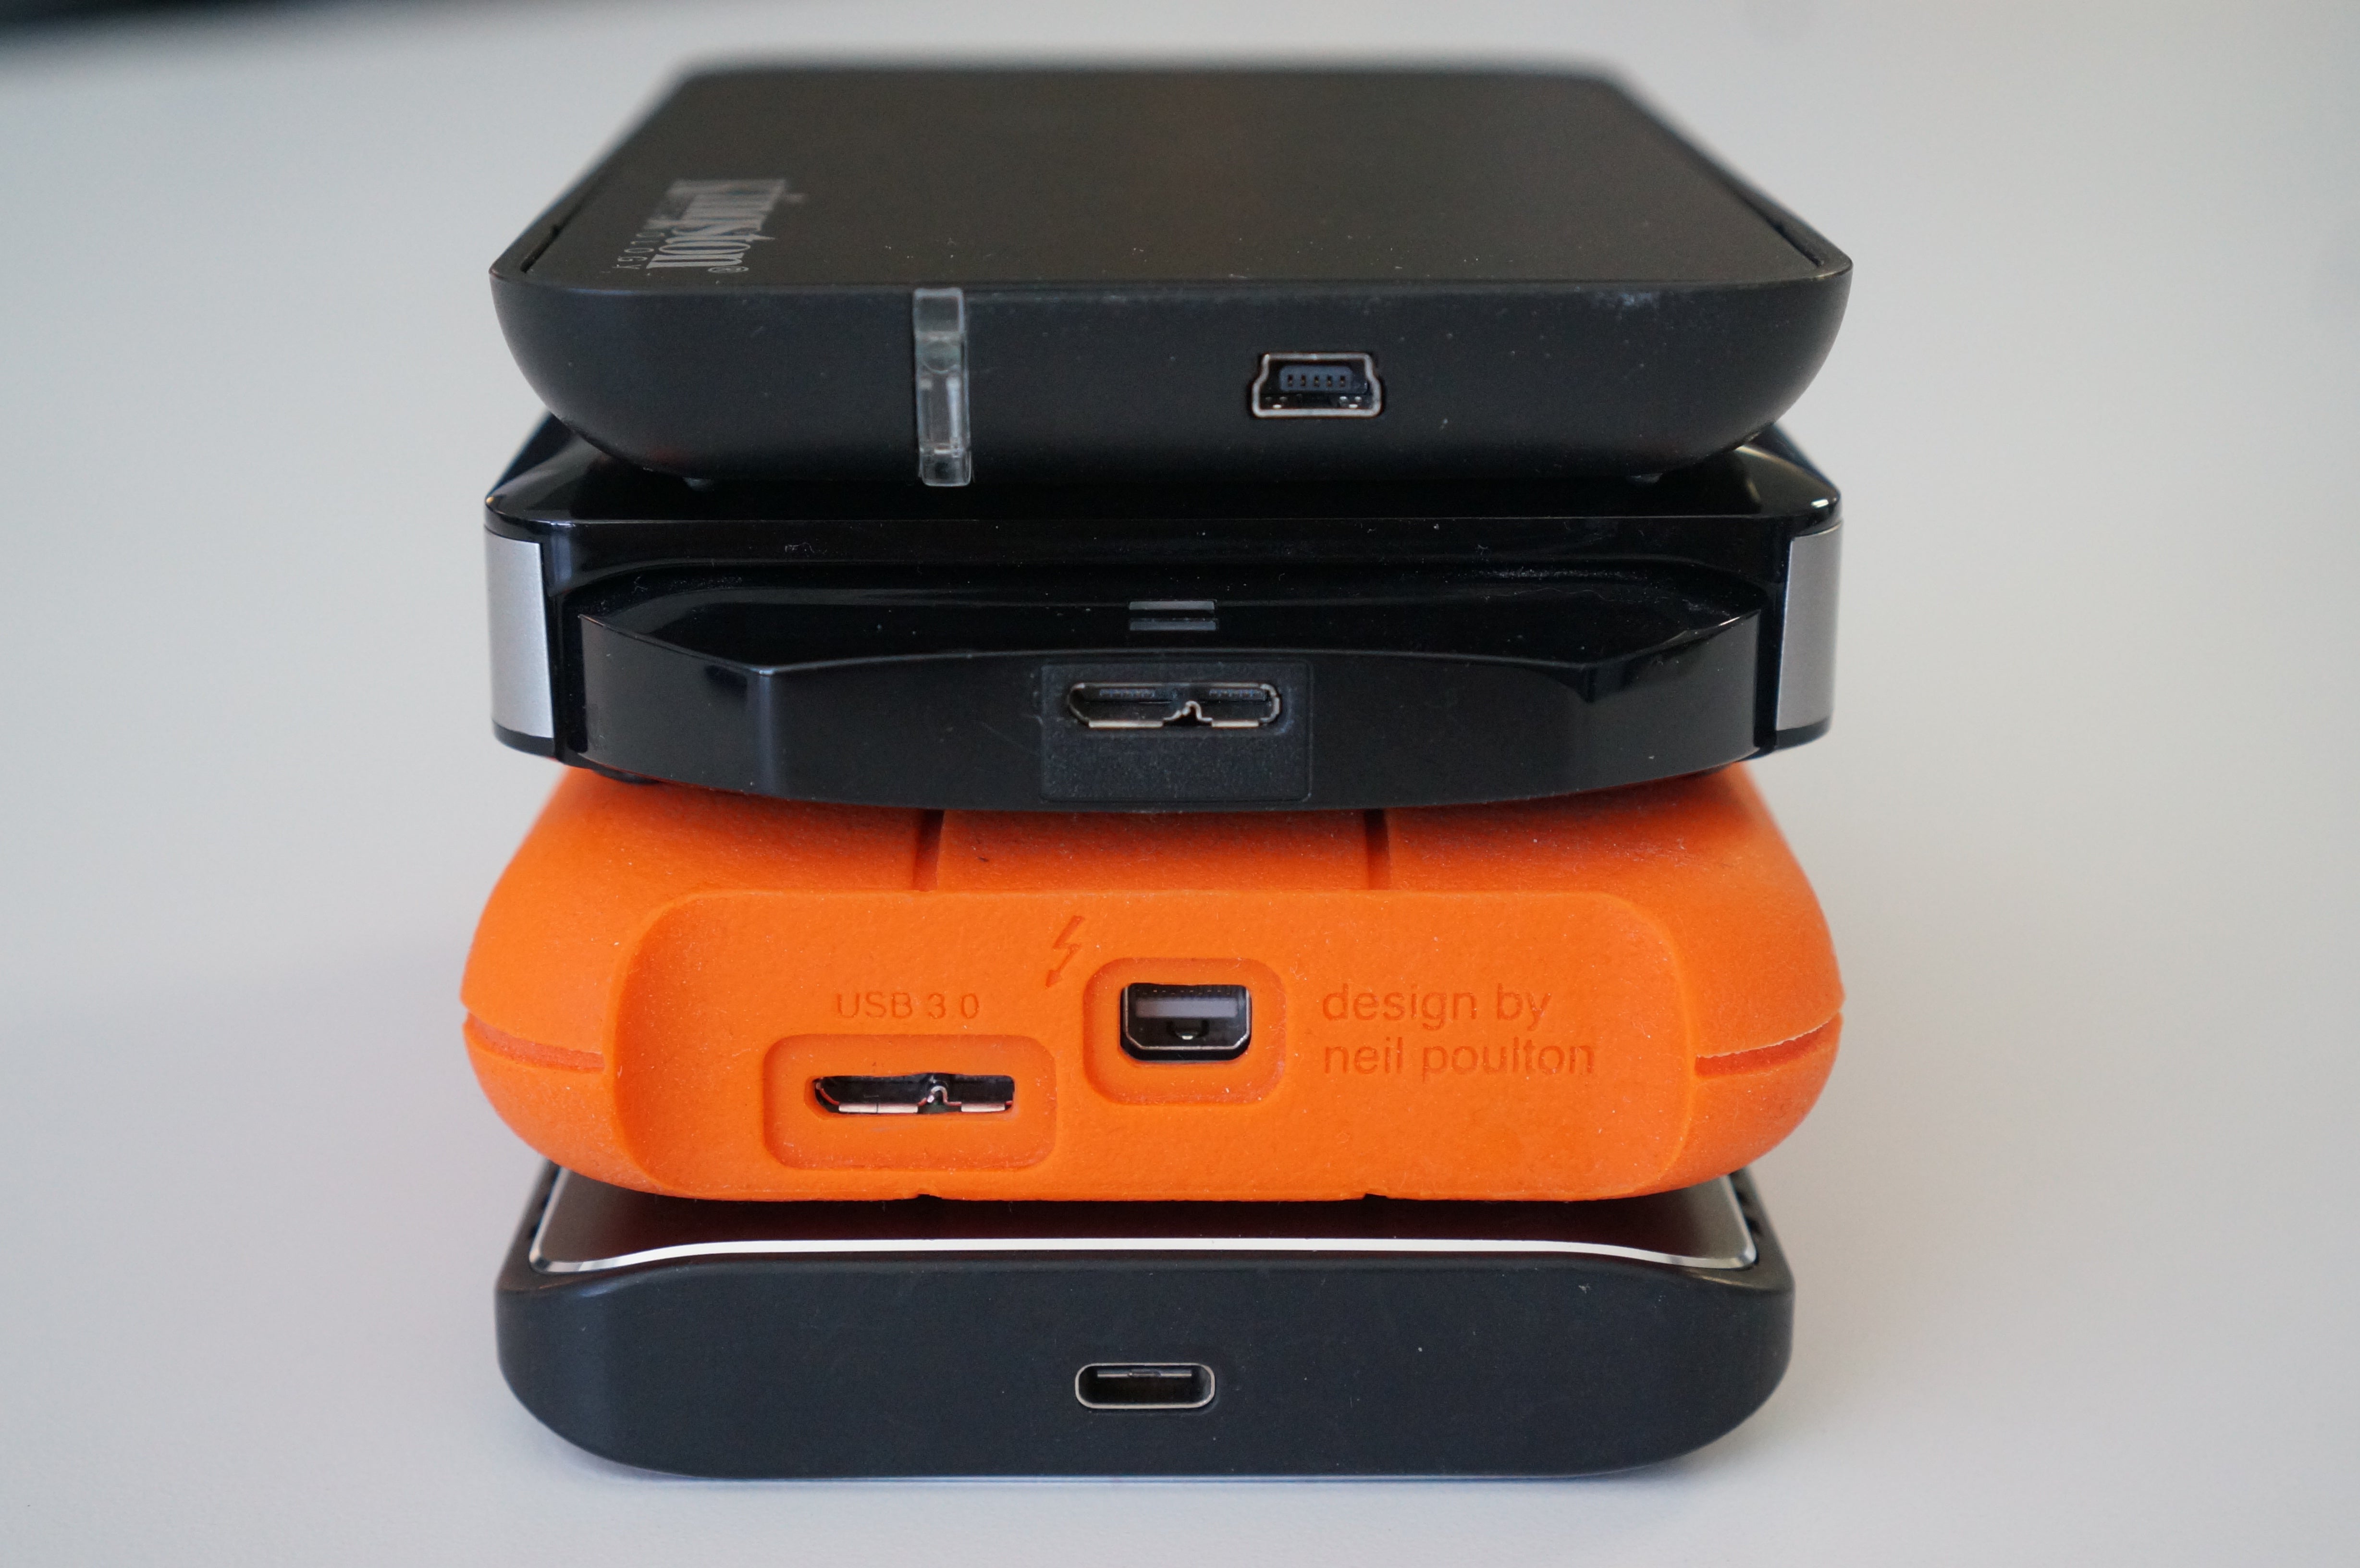
The top drive uses the older, slower Mini-USB interface. The second drive features the connector that replaced it: Micro B SuperSpeed. The Orange drive features both a SuperSpeed Micro B and Thunderbolt 2 (mini DisplayPort connector). The bottom drive features USB-C or USB Type C.
Ports
External drives come with a variety of ports, though they’re gradually (and thankfully) consolidating on the orientation-agnostic Type-C connector. Here’s the list of connectors you might see on your drive:
USB 3 Micro-B — This wider, flatter port is still very common on many lower-cost portable and desktop external hard drives. It’s actually the same Micro USB port used on your phone, but with more data lines to hit USB 3.0 speeds. It’ll do 5Gbps and is fine for hard drives and SATA (internally) SSDs. Micro-B cables are generally Type-A on the PC end.
USB 3 Type-B is the larger, squarer version of USB 3.0 Micro B. Type B ports are becoming rare, though you might find one on older 5.25-inch enclosures, printers, and scanners. It supports speeds up to 5Gbps and cables are generally Type-A on the PC side.
USB Type-C or simply Type-C is the latest USB connector and the one the world is standardizing on. It’s small, easy to insert, and you don’t have to worry about which side faces up as with Type-A.
Keep in mind that Type-C refers only to the connector itself. What is carried over the wires varies greatly: USB 2.0 High Speed (480Mbps) to USB 3.2 SuperSpeed 20Gbps, as well as USB4 and Thunderbolt 3 and any combination of them.
USB Type-A You won’t find this familiar rectangular port on any drive, but you will still find it on plenty of PCs and laptops as well as the male version on the other end of most Type-B and Type-C adapter cables.
Thunderbolt 2 is dead at this point. It’s found on older Macs, but even Apple put it out to pasture in 2017. There’s no need to invest in a Thunderbolt 2 drive unless it’s for legacy support issues. That said…
…Apple sells a bi-directional Thunderbolt 1/2 to 3 adapter if you need to connect the one generation to the other. The adapter does not, however, carry power, so bus-powered external drives (no power jack) will require a powered dock.
eSATA is another legacy port that’s disappeared from newer tech. Created for attaching external storage to your computer’s SATA bus, eSATA was a cheap way in its day to move beyond the toddling 60MBps performance of USB 2.0.
5Gbps USB 3.0 put the last nail in eSATA’s coffin. As with Thunderbolt 2, the only reason to invest in an eSATA drive is for use with older computers.
Two drives for backup?
There’s a fundamental maxim in backup, appropriately named the Rule of Three. It states that you should always maintain three copies of your irreplaceable data: the original data, a backup, and a backup of the backup.
Preferably, the two backups are kept in separate locations, one being offsite (online, or another location). Keeping a copy online is great for smaller amounts of data and certainly meets the offsite criteria.
However, for vast photo, audio, and/or video collections, external drives in pairs (or more), are a far faster solution. Especially with most broadband still being relatively limited in upstream speed.
Some of the older reviews you might find here feature results gathered on an Intel Core i7-5820K/X99 motherboard with 64GB of Kingston DDR4 memory running Windows 10. A discrete Gigabyte Alpine Ridge Thunderbolt 3 card and Ableconn USB 3.2 2×2 20Gbps card (Asmedia 2142 controller) were used for connecting the external drives. An Asus USB 3.1/10Gbps (Asmedia 1142 controller) card was employed for some of the really old drives on the chart.
Subsequently, drives were tested using Windows 11 64-bit running on an MSI MEG X570/AMD Ryzen 3700X combo with four 16GB Kingston 2666MHz DDR4 modules, a Zotac (Nvidia) GT 710 1GB x2 PCIe graphics card, and the Asmedia ASM3242 USB 3.2×2 card. Copy tests utilize an ImDisk RAM disk using 58GB of the 64GB total memory.
Currently, we’re using Windows 11 64-bit running on an X790 (PCIe 4.0/5.0) motherboard/i5-12400 CPU combo with two Kingston Fury 32GB DDR5 4800MHz modules (64GB of memory total). Both 20Gbps USB and Thunderbolt 4 are on the board and Intel integrated graphics are employed. The 48GB transfer tests utilize an ImDisk RAM disk taking up 58GB of the 64GB of total memory. The 450GB file is transferred from a which also runs the OS.
We run various synthetic benchmarks including Crystal Disk Mark 6/7/8, AS SSD 2, and Iometer. We also perform real-world transfer tests using a 48GB batch of small files and folders, as well as a large 48GB and 450GB files. The testbed boots from a NVMe drive, but the real-world (Windows) file transfers are performed to and from a 58GB RAM disk.
Note that all review charts feature results garnered from the same test bed.
External drive FAQ
1.
What is the difference between an SSD and an HDD?
HDDs (hard disk drives) have been around for more than 50 years. They are essentially boxes containing spinning platters with read/write arms that skim across them to detect the orientation of, or re-align particles in, the magnetic material that coats the platters.
SSDs (solid state drives), on the other hand, use flash memory and have no moving parts inside the drive. Data is instead stored in cells—aka, voltage traps—which are interconnected in a matrix. The matrix approach allows for data to be pushed or pulled to/from many different places at once and significantly increases both read and write speed—on the order of 100 times faster these days.
Generally speaking, SSDs are a better bet for your external drives due to their smaller size, faster speeds, and far superior ruggedness and durability. The main drawback to SSDs is that you pay quite a bit more per terabyte of storage. As technology and production techniques improve, the price of SSDs has and will continue to drop.
2.
How often should you back up your data?
Ideally, you should backup your data as often as possible. This is especially true if you are working on an important project or have data that you absolutely cannot afford to lose.
If you have your external hard drive connected to your computer at all times, it is a good idea to automate the backup process and have the drive back up your data every hour or so. If you disconnect or travel with your external hard drive, you should try to remember to back up your data onto it every time you change your data or at least every day. See our roundups of the best Windows backup software and the best online backup services to learn more.
3.
Why is my actual hard drive storage smaller than specified?
This comes down to the perceived size of storage (KB, MB, GB, TB) versus the actual size of that storage. Most consumers are led to believe that a Kilobyte (KB) is 1,000 bytes when it is actually 1,024 bytes. Most consumers then are led to believe that a Megabyte (MB) is 1,000 KB when it is actually 1,024 KB. So a manufacturer’s hard drive that claims to have 1 TB of storage actually has only 931.31 GB of storage. It is essentially a rounding error that manufacturers neglect to advertise because round numbers are easier to understand.
Another reason that actual storage may appear less than advertised is that hard drives have to be formatted to read and write data properly. When formatting, a portion of the storage space on the drive is allocated in order to catalog the data.
4.
How long does an external hard drive last?
The average lifespan of an external hard drive is about three to five years. However, this is highly dependent upon the make and model and the conditions of usage and storage. The more you use an external hard drive, the less reliable it becomes.
One way to guesstimate the lifespan of your hard drive is to look at the manufacturer’s warranty and the TBW (total terabytes written) number. You can determine the estimated daily amount of storage you write and then extrapolate from there to see how long you can continue to use it everyday until you reach the TBW. These numbers are not entirely reliable, and drives can last much longer than these two values, but they give an idea as to when you will likely begin to encounter issues.
5.
How do external hard drives fail?
There are a number of ways that an external hard drive may fail. They are especially susceptible to failure due to frequent mishandling, outdated drivers, connecting and disconnecting, and unsafe or forced ejections. To ensure that you keep your hard drive working properly, keep it stored in a safe place, try not to drop it, update your drivers, and make sure that you connect and disconnect it from devices properly.
Our PC storage drives won’t last forever and that’s why it’s always a good idea to use backup software to keep your data safe. The best Windows backup software can keep us covered when our primary drive finally croaks.
While Apple’s Time Machine provides users with an effective, set-it-and-forget-it recovery system, Microsoft users aren’t so lucky. Instead, users are stuck deciding the best way to keep their data safe with a patchwork system of restore points, recovery discs, and file backups. Thankfully, a number of great third-party backup options have cropped up in recent years to help solve the woes of Windows users.
Below you’ll find a list of our favorite Windows backup clients. These come with easy-to-use and attractive designs as well as a full range of file and image backup capabilities. We’ve even included a couple free options that are more than worthwhile. Below our picks you can find more info about what to look for in a Windows backup program.
Also, check out PCWorld’s roundup of best external drives for recommendations on reliable storage options—an important component in a comprehensive backup strategy. Alternatively, if you’d prefer to keep your data on the cloud or need the flexibility of data storage for different operating systems, then check out our list of best online backup services.
Updated 12/07/2023: Check out our latest review of FBackup 9. This free service will back up not only to Google Drive and Dropbox, but also to and from local storage. You’ll need to put up with some advertisements and up-selling, but it’s worth it for this versatile, no-cost backup client.
PROMOTION
Backup software powered by AI – EaseUS Todo Backup
EaseUS Todo Backup covers everything you need for backups. With AI smart backup, automate your backup tasks on schedule, run to make copies, do realtime protections, and restore everything instantly. No extra effort is required. Also, get 250GB cloud storage for free.
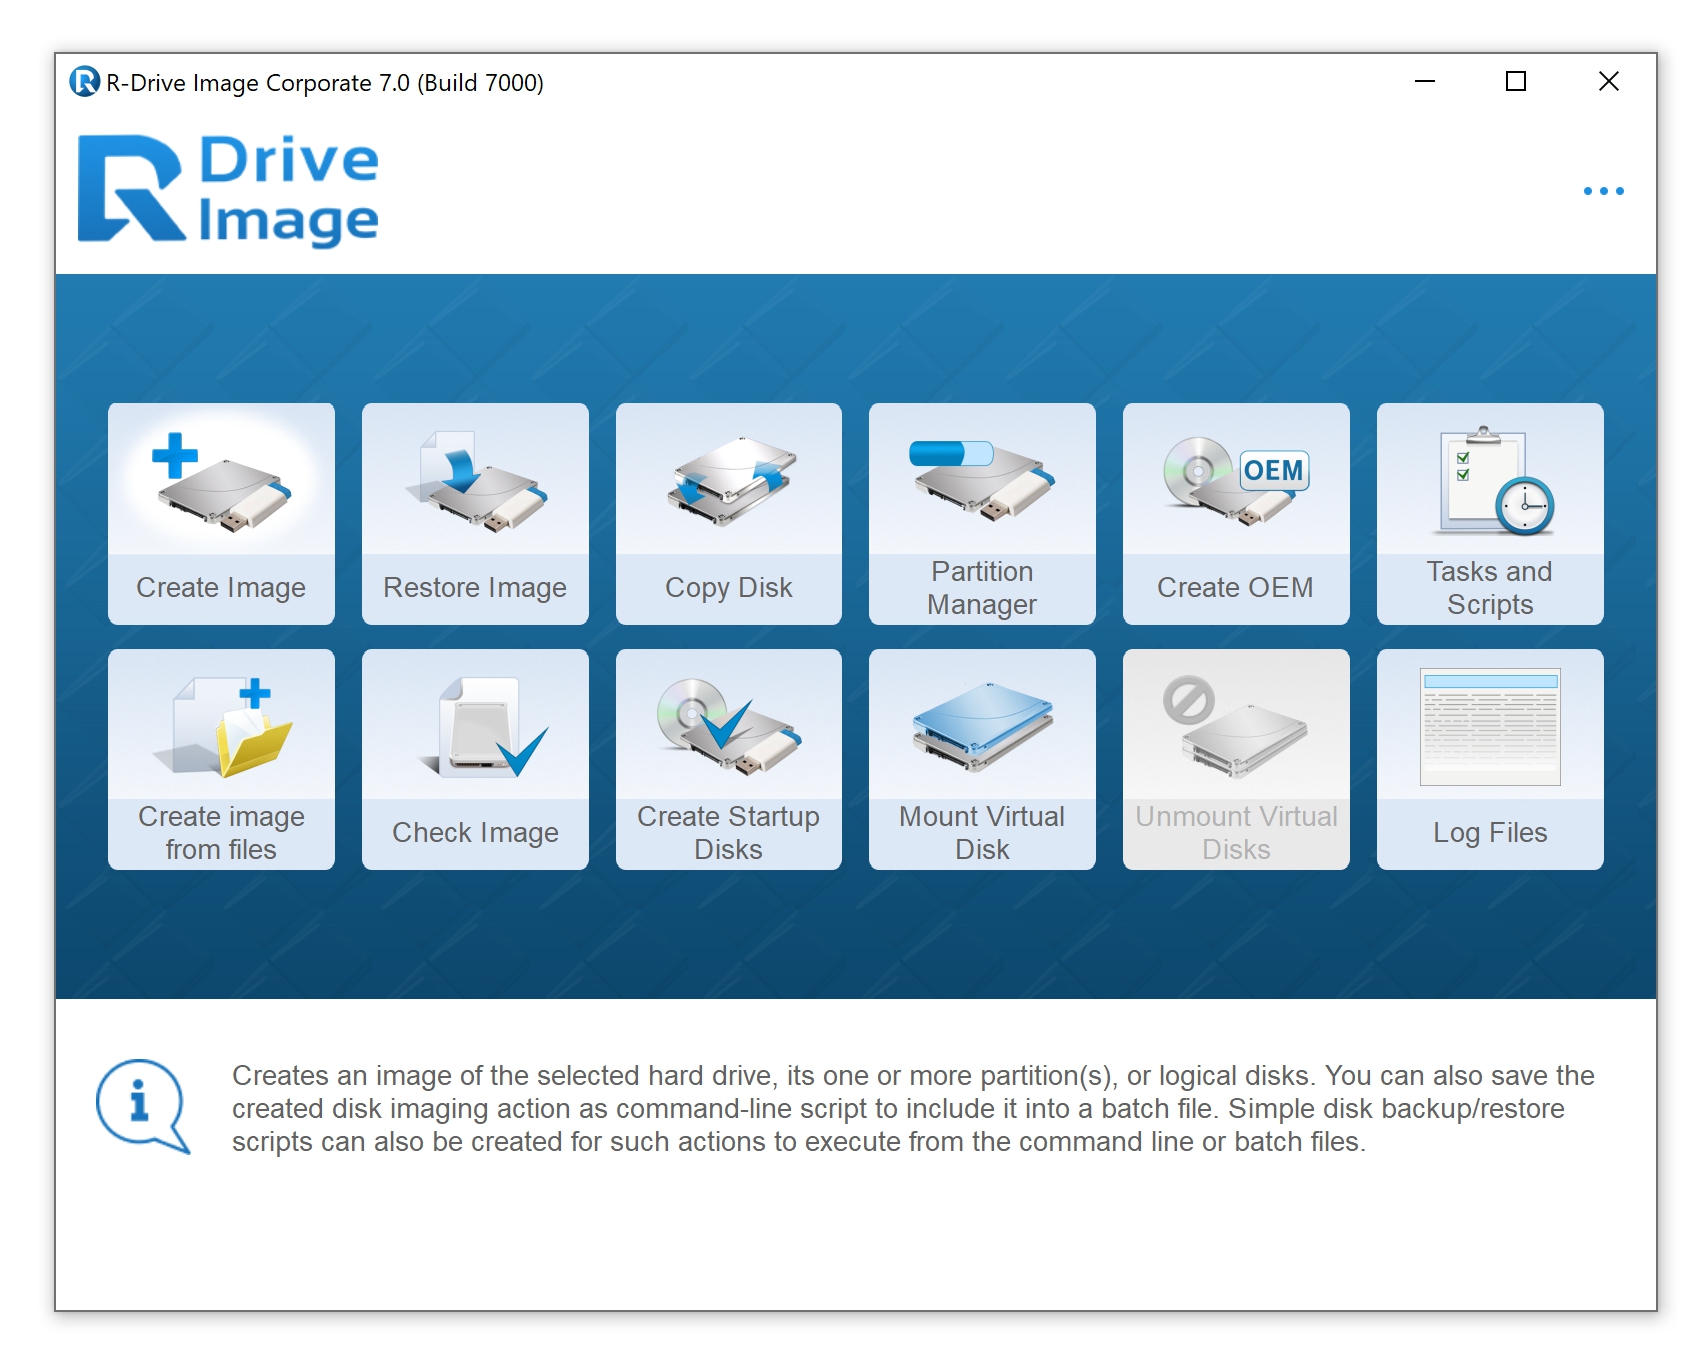
R-Drive Image has always been a favorite of ours—a low-resource-consuming product that was ultra-reliable in creating backup images of partitions and disks. But it didn’t have as much polish as Acronis’s backup program (below) and wasn’t as feature-rich. That has changed with this latest version, which now has a more modern, user-friendly interface and more versatility in the types of backups you can perform.
The latest 7.1 version adds WinPE boot-disc support and VHD compatibility to an already impressive arsenal of features. VHD compatibility, in particular, is a great new feature as R-Drive no longer entirely relies on its own proprietary images, but now allows users the option to keep backups in VHD (Virtual Hard Disk) format—which addresses one of the only previous complaints we had about the service.
There’s a reason Acronis is renowned in the world of backup software. Cyber Protect Home Office (previously named Acronis True Image) is capable, flexible, and rock-solid reliable. Indeed, it’s easily the most comprehensive data safety package on the planet.
Besides offering unparalleled backup functionality that’s both robust and easy to navigate, it integrates security apps as well, which protect against malware, malicious websites, and other threats using real-time monitoring.
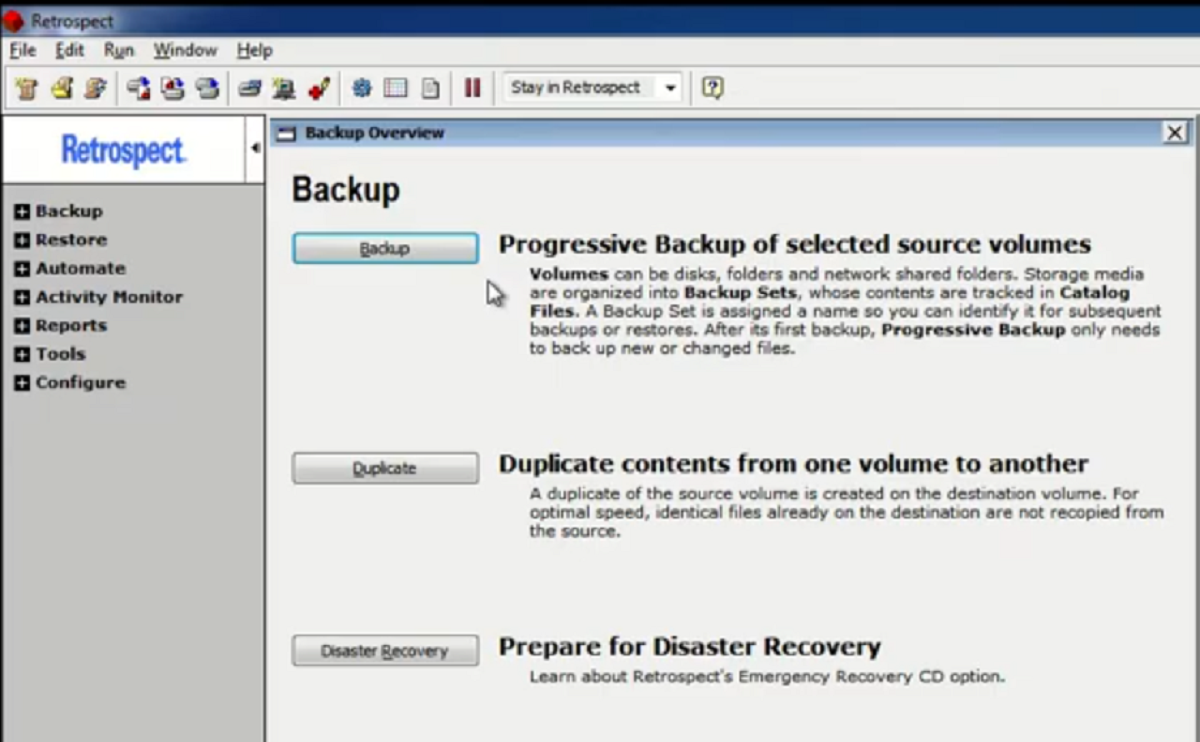
Retrospect Solo – Best for added ransomware protection
Pros
Easy to use (once learned)
Copious feature set
Good performance
New anti-ransomware backup protection
Cons
Somewhat steep learning curve
Price When Reviewed: $49
Best Prices Today:
The latest version (18.5) of this stalwart Windows backup program is every bit as feature-packed as we’d expect. It even adds an interesting pre-backup file scanning to root out anomalies before overwriting your previous backup—a nod to the emergence of ransomware as a concern. It’s got a bit of a learning curve, but once familiar, Retrospect Solo delivers the goods.
Friendlier data selection than Windows File History
Backs up to local media, network locations, and online services
Logging, notifications, FTP support, and lots of other options
Cons
No image backups
Must be loaded for scheduled backups
Price When Reviewed: Free
Best Prices Today:
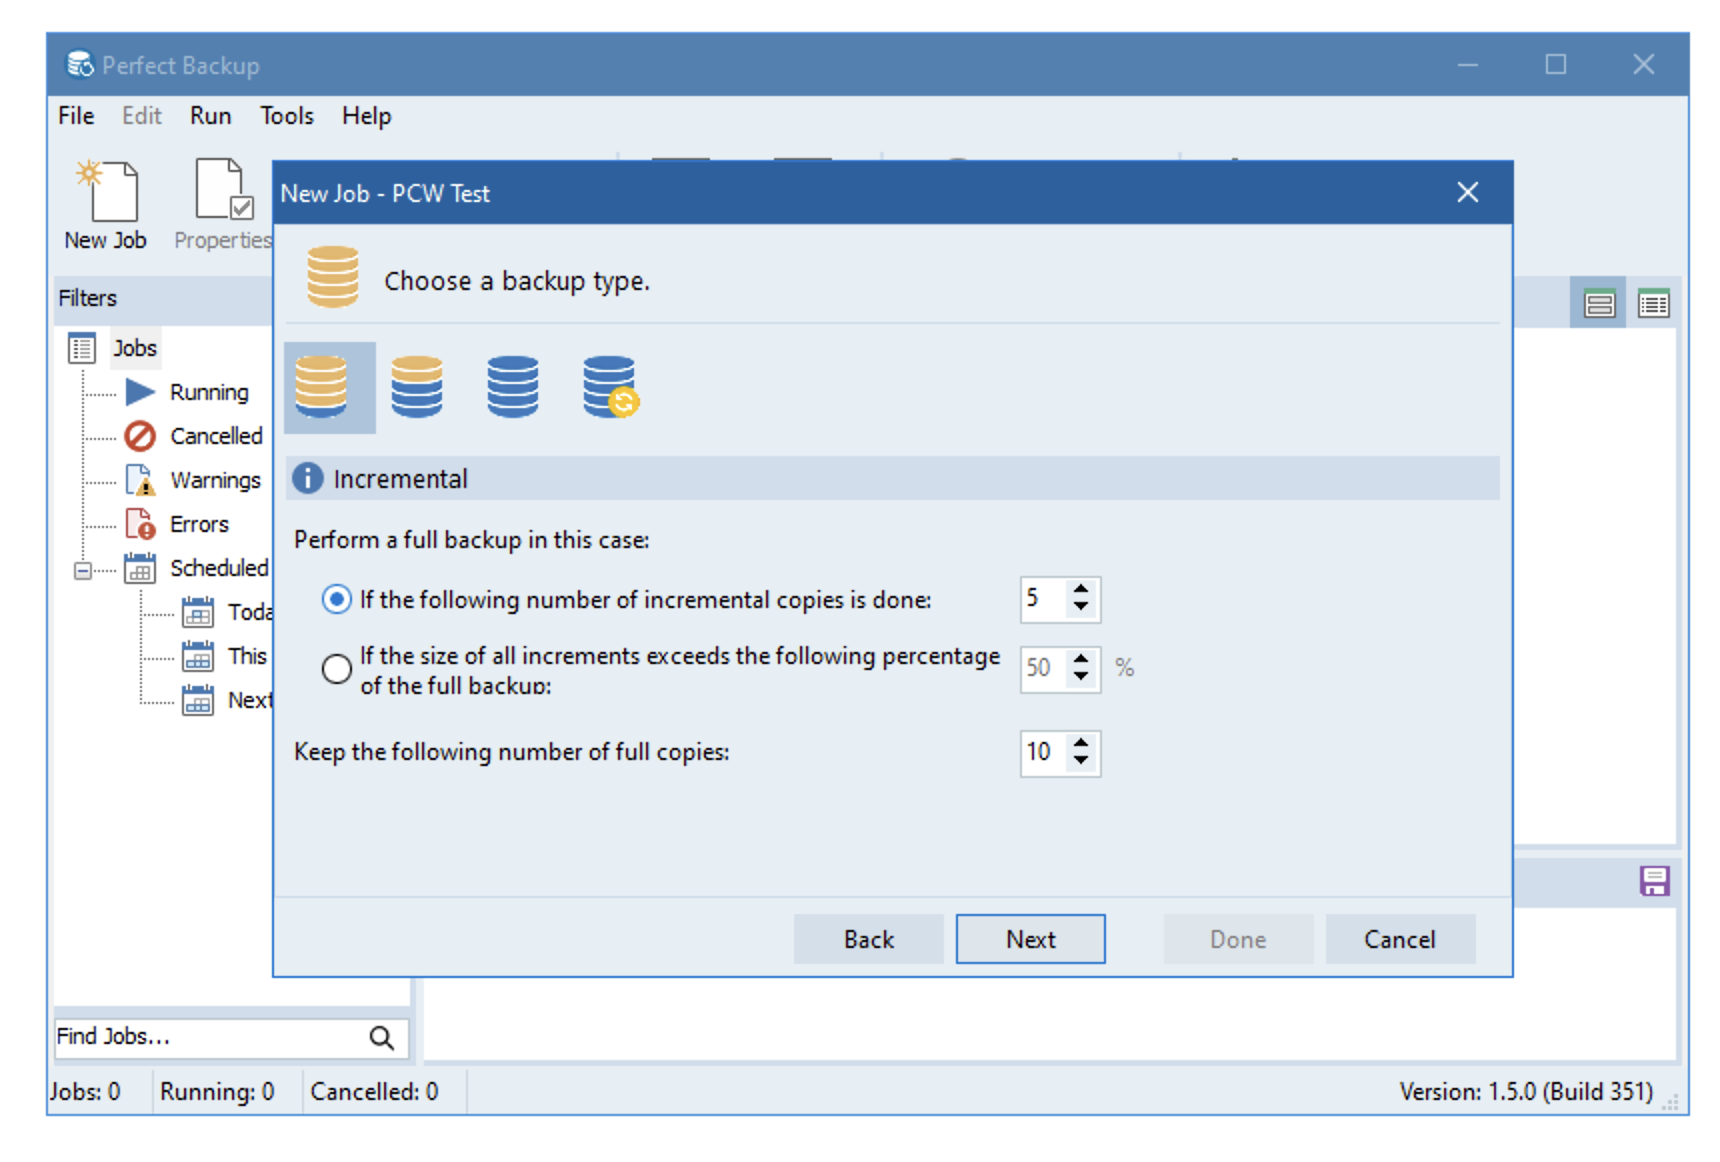
Perfect Backup provides you with excellent backup options at no cost, and there’s no better price than free. Perfect Backup is both more stable and easier to use than many of the premium options for Window’s backup software. It lacks image backups for disaster recovery, which is admittedly disappointing, but also to be expected in a free service. Fortunately, it allows just about every other type of backup you’d need, such as backing up to local media, the company’s online service, and other network locations. Most users looking for an easy and free way to securely store their important data need look no further.
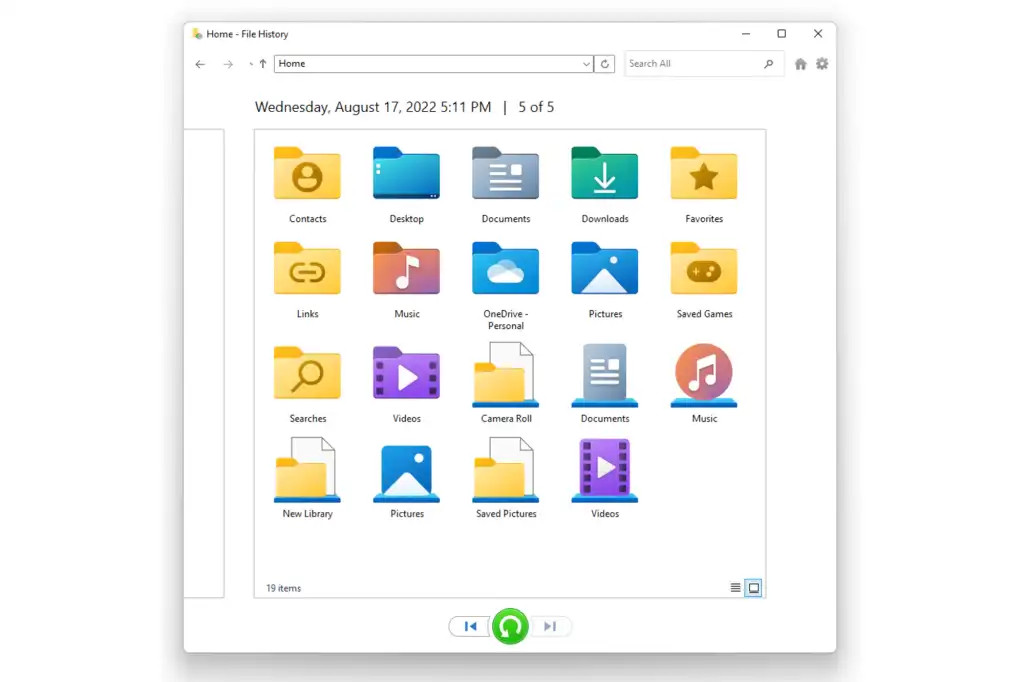
Windows File History backup – Best free Windows backup runner-up
Pros
Excellent continuous data protection with versioning
Easy, timeline browsing of backed-up files
Integrated into Windows
Backs up user-created libraries
Cons
Easy “Add folder” function removed from Windows 11
Price When Reviewed: Free with Windows
Among the free programs we tested, Windows File History backup is one of the easiest continuous data protection software for Windows. It’s unfortunate that the latest version removed the “add folder” function from File History, but otherwise it continues to improve upon an already solid backup program. Also, it provides many of the features and functions of other third-party paid backup programs, all for free. And you can’t argue with free. It would’ve taken the top spot for free options if not for the fact that Perfect Backup has easier-to-use data selection tools.
Arcserve ShadowProtect SPX – Best Windows backup for SMBs
Pros
Fast and reliable continuous data protection
Super easy restores to real or virtual hard drives
Handy timeline overview
Excellent disaster recovery
Cons
Slightly daunting login dialog
Image-based backup only
Pricey for end users
Price When Reviewed: $99.95
Best Prices Today:
If you are looking for something more robust than just file and folder backup for your business, then Arcserve ShadowProtect SPX has you covered. It comes loaded with a full feature-set that allows you to quickly and easily restore your data and it has support for third-party virtual hard drives. It is also an excellent choice not just for Windows users, but also Linux users or those in mixed Windows/Linux environments. ShadowProtect is a bit pricey, but it is an extremely reliable backup software with foolproof continuous data protection.
We run each program through the various types of backups it’s capable of. This is largely to test reliability and hardware compatibility, but we time two: an approximately 115GB system image (two partitions), and a roughly 50GB image created from a set of smaller files and folders. We then mount the images and test their integrity via the program’s restore functions. We also test the USB boot drives created by the programs.
How to pick a backup software
As with most things—don’t over-buy. Features you don’t need add complexity and may slow down your system. Additionally, if you intend to back up to a newly purchased external hard drive, check out the software that ships with it. Seagate, WD, and others provide backup utilities that are adequate for the average user.
File backup: If you want to back up only your data (operating systems and programs can be reinstalled, though it’s mildly time- and effort-consuming), a program that backs up just the files you select is a major time-saver. Some programs automatically select the appropriate files if you use the Windows library folders (Documents, Photos, Videos, etc.).
Image backup/imaging: Images are byte-for-byte snapshots of your entire hard drive (normally without the empty sectors) or partition, and can be used to restore both the operating system and data. Imaging is the most convenient to restore in case of a system crash, and also ensures you don’t miss anything important.
Boot media: Should your system crash completely, you need an alternate way to boot and run the recovery software. Any backup program should be able to create a bootable optical disc or USB thumb drive. Some will also create a restore partition on your hard drive, which can be used instead if the hard drive is still operational.
Scheduling: If you’re going to back up effectively, you need to do it on a regular basis. Any backup program worth its salt allows you to schedule backups.
Versioning: If you’re overwriting previous files, that’s not backup, it’s one-way syncing or mirroring. Any backup program you use should allow you to retain several previous backups, or with file backup, previous versions of the file. The better software will retain and cull older backups according to criteria you establish.
Optical support: Every backup program supports hard drives, but as obsolete as they may seem, DVDs and Blu-Ray discs are great archive media. If you’re worried about optical media’s reliability, M-Disc claims its discs are reliable for a thousand years, claims that are backed up by Department of Defense testing.
Online support: An offsite copy of your data is a hedge against physical disasters such as flood, fire, and power surges. Online storage services are a great way to maintain an offsite copy of your data. Backup to Dropbox and the like is a nice feature to have.
FTP and SMB/AFP: Backing up to other computers or NAS boxes on your network or in remote locations (say, your parent’s house) is another way of physically safeguarding your data with an offsite, or at least physically discrete copy. FTP can be used for offsite, while SMB (Windows and most OS’s) and AFP (Apple) are good for other PCs or NAS on your local network.
Real time: Real-time backup means that files are backed up whenever they change, usually upon creation or save. It’s also called mirroring and is handy for keeping an immediately available copy of rapidly changing data sets. For less volatile data sets, the payoff doesn’t compensate for the drain on system resources. Instead, scheduling should be used.
Continuous backup: In this case, ‘continuous’ simply means backing up on a tight schedule, generally every 5 to 15 minutes, instead of every day or weekly. Use continuous backup for rapidly changing data sets where transfer rates are too slow, or computing power is too precious for real-time backup.
Performance: Most backups proceed in the background or during dead time, so performance isn’t a huge issue in the consumer space. However, if you’re backing up multiple machines or to multiple destinations, or dealing with very large data sets, speed is a consideration.
FAQ
1.
How often should backups be scheduled?
Ideally, you should schedule backups of your data as often as possible. This is especially true if you are working on an important project or have data that you absolutely cannot afford to lose. It is a good idea to automate the backup process and have the Windows software back up your data every hour or so.
2.
What is the difference between Google Drive, Dropbox, OneDrive, and Windows backup services?
Services such as Google Drive, Dropbox, and OneDrive are considered to be cloud storage services. This means that a user must place their files or data onto the service’s cloud manually. It’s almost like having a physical storage drive in the internet’s virtual cloud.
Windows backup software, meanwhile, provides continuous versioning and backup of all the file history on your device. It will continuously and automatically backup every specified file on a device. Windows backup software also offers additional data security measures such as file encryption. Furthermore, these backup services allow you to create a bootable optical disc or USB thumb drive for recovery after a system crash.
There are cloud backup services (distinct from those mentioned above) that offer much, though not all, of the benefits of a Windows backup program, such as continuous backups and versioning for multiple devices. You can learn more about them in our roundup of best cloud backup services.
3.
Will Windows backup software slow down my computer?
In most situations Windows backup software won’t noticeably slow down your computer. If you are backing up to more than one device or multiple different destinations, or if you are backing up very large data sets, then you may notice your system slow down as it performs the backup. Otherwise, Windows backup software typically runs in the background or during dead time so you shouldn’t notice a decrease in performance.
Also, it’s a good idea, if the option is available with your software, to run a continuous backup. This will cause the software to perform backups of only the files you change in real time and it requires less bandwidth and processor resources to maintain.
4.
Does Windows Backup save everything?
Yes, by default Windows Backup and Restore saves all data files including those in your library, on your desktop, and in Windows’ default folders. It will also create a system image if you need to restore Windows in the case of an emergency or system failure.
A system image is a great way to save all the data on your system including installed applications. But be careful as this system image can potentially take up hundreds of gigabytes of storage on your computer’s hard drive.
With the release of Wine 8, the Windows replica for Linux has matured again and enables more Windows programs. In most cases, however, additional work is necessary to set up Windows programs.
is not an emulator like Qemu or a virtualization environment like Virtualbox, but a runtime environment that aims to emulate the Windows API on Linux. This API mapping is not complete, but it is comprehensive enough for many Windows programs to run on the Linux desktop.
Wine began as a hobby project 30 years ago at the time of Windows 3.1 with its 16-bit API. After a simple “Hello World” program, it quickly succeeded in getting Solitaire to run. With Windows 95, Wine had to support the new 32-bit API and soon showed impressive partial success, so Corel invested in further development of Wine from 1999 to 2000 to use it for the then popular Wordperfect.
In the meantime, further development disintegrated into commercial branches, which scared off many open-source developers and hindered progress. Wine was revived by Google in 2006, because at that time Wine served as a compatibility layer for the Linux version of Picasa. Google thus saved itself a complete porting of Picasa to Linux.
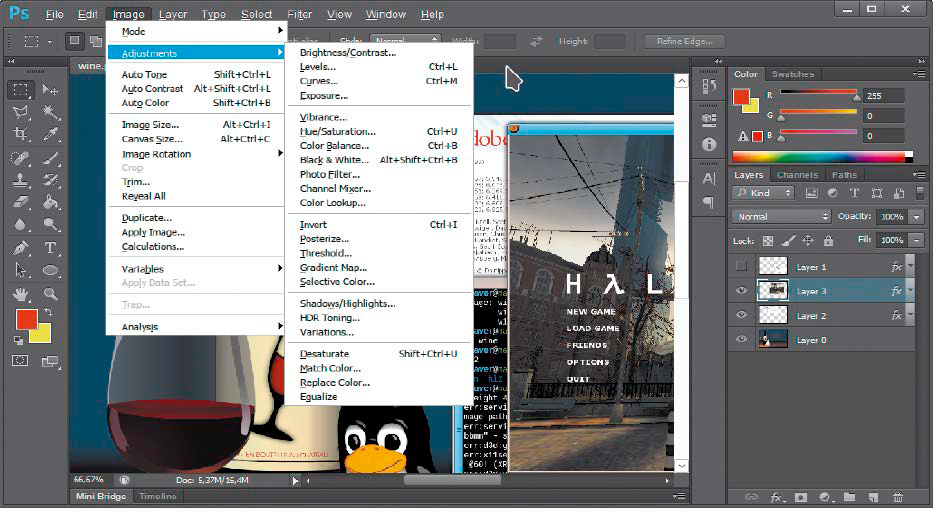
Not as fresh as new, but happy with Wine 8: Older Windows programs usually run better under Wine than completely new versions. Installation instructions help with Wine configuration.
IDG
Today, the gaming scene and especially Valve with its Wine-based compatibility layer is the driving force behind Wine. After all, Microsoft’s office package MS Office is no longer in focus now that a cloud variant, Office 365, runs in the browser — even under Linux. This does not apply to games — and that is why the development of Wine continues undaunted.
Progress of Wine 8
The now available version 8 of Wine marks a milestone in the development and supports more current programs and games again. This is made possible by the conversion of the Wine modules to the format of “portable executables,” which some games require. In addition, Wine can now run 32-bit programs in its 64-bit environment without having to install all the required libraries in 32-bit on the host system.
This article therefore shows how to set up a current Wine edition in Ubuntu 22.04/23.04 and the first steps to configure this environment for Windows programs. Today, Wine simulates all Windows versions from XP to 11, although the emulation of Windows 10/11 has not yet matured in all details.
Appdb: Does a Windows program work?
Simple applications run immediately and without problems after installation with little preparation, complex programs often need some manual configuration. For difficult candidates such as Adobe Photoshop, which in version CS6 also runs well under Linux with Wine 8, there are alternatives and installation aids. Even though the progress made by Wine developers is astonishing, in practice there are still a number of programs that require special rules for the libraries used.
Whether a Windows program runs in Wine does not have to be determined empirically by trial and error. It is always worth taking a look at the searchable application database before installing and working with Wine.
It shows how good or bad the support is for certain programs. Applications are given a status according to the categories platinum, gold, silver, bronze, or rubbish, depending on the reports of Wine users who are keen to experiment and share their results. All applications categorized below Gold status usually run only after a few pull-ups or under Wine alternatives such as Crossover. After clicking on “Show,” many entries show a mini-guide with installation instructions, which can sometimes be demanding. It is always important to know the version number of Wine, because many programs will only run with newer versions such as 7 or 8.
Crossover: For difficult cases
A utility based on Wine, which major Wine developers are also working on, is the commercial Crossover from Codeweavers. This is not simply a fork of the original Wine source code, but an extension. It is always close to the current Wine, but has a few more libraries on board for improved compatibility with Windows programs.
A look at the program database of Crossover: What does not work satisfactorily in Wine may run in this extended, but commercial Wine offshoot.
IDG
specializes in typical office applications such as Microsoft Office. It offers a graphical interface for installing and managing Windows programs. Crossover is not open source, but a commercially distributed program that starts at $74 euros. A 14-day evaluation version allows a free test (after registration with a mail address).
Codeweavers provides a suitable binary package as RPM and DEB for the various Linux distributions. After the simple installation via the package manager, a graphical user interface takes over the further setup, for example for the required Truetype fonts. The search atshows which programs in particular really work with Crossover. The developers point out that Crossover 22.x is still based on Wine 7.7 (Wine 8 is the impetus for Crossover 23, which is to appear at the end of 2023).
Ubuntu: Install the latest Wine
In Ubuntu (and Linux Mint) of all places, Wine is only available in an outdated version in the standard package sources. We want to settle for nothing less than the latest Wine here, direct from the developers. The first step towards this is to include 32-bit package sources, because Wine 8 still requires a whole lot of libraries for best compatibility:
sudo dpkg --add-architecture i386
A directory for the signatures of the Wine packages is created by the command:
downloads the keychain for verifying the packages. The inclusion of the package sources in Ubuntu is done by specifying the codename of the Ubuntu version, “jammy” for Ubuntu 22.04 LTS and also for Linux Mint:
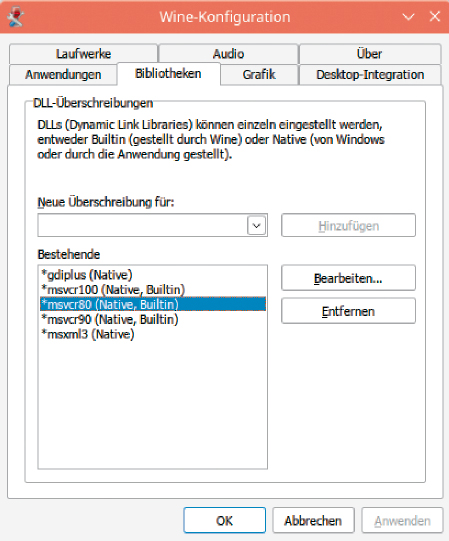
Replaces individual Windows libraries: Some programs require winecfg to replace the supplied Wine libraries with original Windows DLLs.
IDG
After installing Wine, the first step is to start the winecfg configuration program. The program creates an environment for Wine in the hidden folder “.wine” in the home directory. There it creates an image of the Windows registry in the form of text files as well as the application files of future installed programs in the subdirectory “~/.wine/drive_c”. In addition, winecfg checks the runtime environment for completeness and offers, for example, to install the .NET runtime Wine-Mono, which must be confirmed in a dialogue.
In this way, winecfg creates the first standard configuration on its own and then displays the further Windows-style settings dialogue. Here, the most important options for fine-tuning are available — for example, to adjust the display, to select an audio device for the sound output, or to add original Windows libraries. An important point is the assignment of virtual drive letters to directories, which is done under “Drive.” This point may be necessary if a Windows program asks for an inserted setup CD for installation or start-up.
Winetricks: Important settings
However, the winecfg tool only represents a small part of the settings and many options can only be edited directly in Wine’s configuration files. A handy script called “winetricks” relieves users of frequently needed tasks and adjustments via simple, graphic menus. The script is distribution-independent, but requires the packages “zenity” and “cabextract,” which are retrofitted in Ubuntu/Mint with:
sudo apt install zenity cabextract
in Ubuntu/Mint.
It is best to install the script in its current version directly from the developers’ server. In the shell, enter
wget http://winetricks.org/winetricks
in the shell to download the script file “winetricks” into the current directory, where you can then start it by means of
sh winetricks
to start it.
After asking whether actions for statistical evaluation should be sent to the Wine developers, the important options are available via the item Select default Wine prefix. The following menu allows the installation of frequently needed DLLs and fonts, as the installation instructions of the Appdb database state in each case. For a shortcut, however, “winetricks” can also be started with command line parameters.
Tips: Most Windows programs require the standard fonts, which are available for installation under Install font > corefonts. In addition, further Wine parameters can be edited via Change Wine settings. It is recommended to activate fontsmooth=gray here, because this significantly improves the display of fonts in Windows programs.
Without the “corefonts” little is possible: Some adjustments in the graphic configuration tool winecfg are essential for Windows programs in Wine. Original DLLs can also be installed here.
IDG
Own environments for programs
Windows programs that need many libraries and settings of their own can in turn be dangerous for other functioning applications in Wine. Wine therefore offers the possibility of several independent environments with their own directories (“prefix”). To create a new Wine environment, for example as “.wine-test”, use this call in the terminal window:
env WINEPREFIX=~/.wine-test winecfg
The directory “~/.wine-test” is automatically created and equipped with a standard configuration. To ensure that this alternative environment is also used for further configuration with winecfg or “winetricks,” it must be specified when calling up the tools:
env WINEPREFIX=~/.wine-test sh winetricks
The prefix is also important for executing setup programs or Windows applications:
In the case of automatically created program starters for an installed application, Wine automatically adds the appropriate prefix as a start parameter.
A prefix is also used to create separate environments for 32-bit under 64-bit systems. Winecfg creates a 64-bit environment for Wine by default, under which some 32-bit programs do not run — not even in the latest Wine 8. To specifically create a 32-bit environment in the folder “~/.wine32” for older Windows software, use the following command:
WINEPREFIX=~/.wine32 WINEARCH='win32' winecfg
Winetricks must also be started with the prefix in order to install fonts or DLLs here or to set options:
WINEPREFIX=~/.wine32 WINEARCH='win32' winecfg
Tips: For experimentation, it is always advisable to install programs in their own Wine prefixes so as not to interfere with other Windows applications. If a program refuses to work, simply delete the directory with the respective prefix from the data carrier. A directory can also be backed up as a whole or transferred to another Linux computer running Wine, because the Wine prefix always contains all settings and files.
Borrowings: Retrofitting original DLLs
For licensing reasons, Wine is not allowed to deliver Windows components. However, some Windows programs have special requirements that the API does not meet, even with Wine 8. They require original Windows libraries.
Winetricks offers a series of libraries via the submenu Install Windows DLL and in most cases downloads an update package from the Microsoft servers. If a program requires a very special DLL, the library can also be copied from an existing Windows system into the Wine directory “~/.wine/drive_c/windows/system32”. Then go to the configuration of winecfg and select the desired library under Libraries > New override for. The item Set creates a new rule, which you can then change with Edit. The setting Native uses the existing, original Windows DLL in the subfolder system32 instead of the built-in library of Wine 8. The script “winetricks” creates these rules on its own when installing DLLs.
Playonlinux: Installation help
Another option for setting up a selection of particularly popular Windows programs in Wine is the front-end . It provides installation aids to persuade even difficult candidates with many adjustments to run. Playonlinux takes care of the necessary Wine settings on its own and installs individual applications in their own Wine environments (prefix). Unfortunately, the development of Playonlinux has been lying idle for a while. Only in Ubuntu and Linux Mint is it still included in the standard sources and can be installed via the software center or the command line with:
sudo apt install playonlinux
Virtual machines: Windows complete
If Wine or Crossover fail with Windows programs that are extremely important for your work, you can always use a virtual machine. A Windows installed there only has access to emulated hardware, but the loss of performance is hardly noticeable on modern computers. The simplest solution for virtualization under Linux is. In order not to have to constantly handle an additional window in which a virtualized Windows is running, the “seamless” mode can be used under Linux. This shows individual program windows from the VM on the Linux desktop.